What is Bambu Studio?
Bambu Studio is the Bambu Labs’ version of a slicing software. A slicing software allows users to take a 3D file (.stl, .obj, .step, etc) and convert it into g-code so the 3D printer can understand and print the file. It does this by taking the model and “slicing” it into individual layers, generating a path for the printer nozzle. Bambu Studio also allows the customization of hundreds of other parameters for a user to get a desired print. This module will only cover the installation and the basic settings of Bambu Studio (not the advanced settings).
Bambu Studio Tour
Once you complete the installation of Bambu Studio and get the software running, explore this run down on the software! (Note: The goal of this module is to familiarize a user with the basic functions in Bambu Studio, not necessarily to teach a user how to do stuff. That will be in the other modules.)
- Installing Bambu Studio-Tutorial
- Printer and Material Settings
- Preset Options
- Quality Tab
- Strength
- Supports
- Other
- Click on the download link for your OS
2. Once downloaded from the webpage, click on the installer in your downloads folder
3. Allow Bambu Studio to make changes to your device, agree to license agreements, then click install
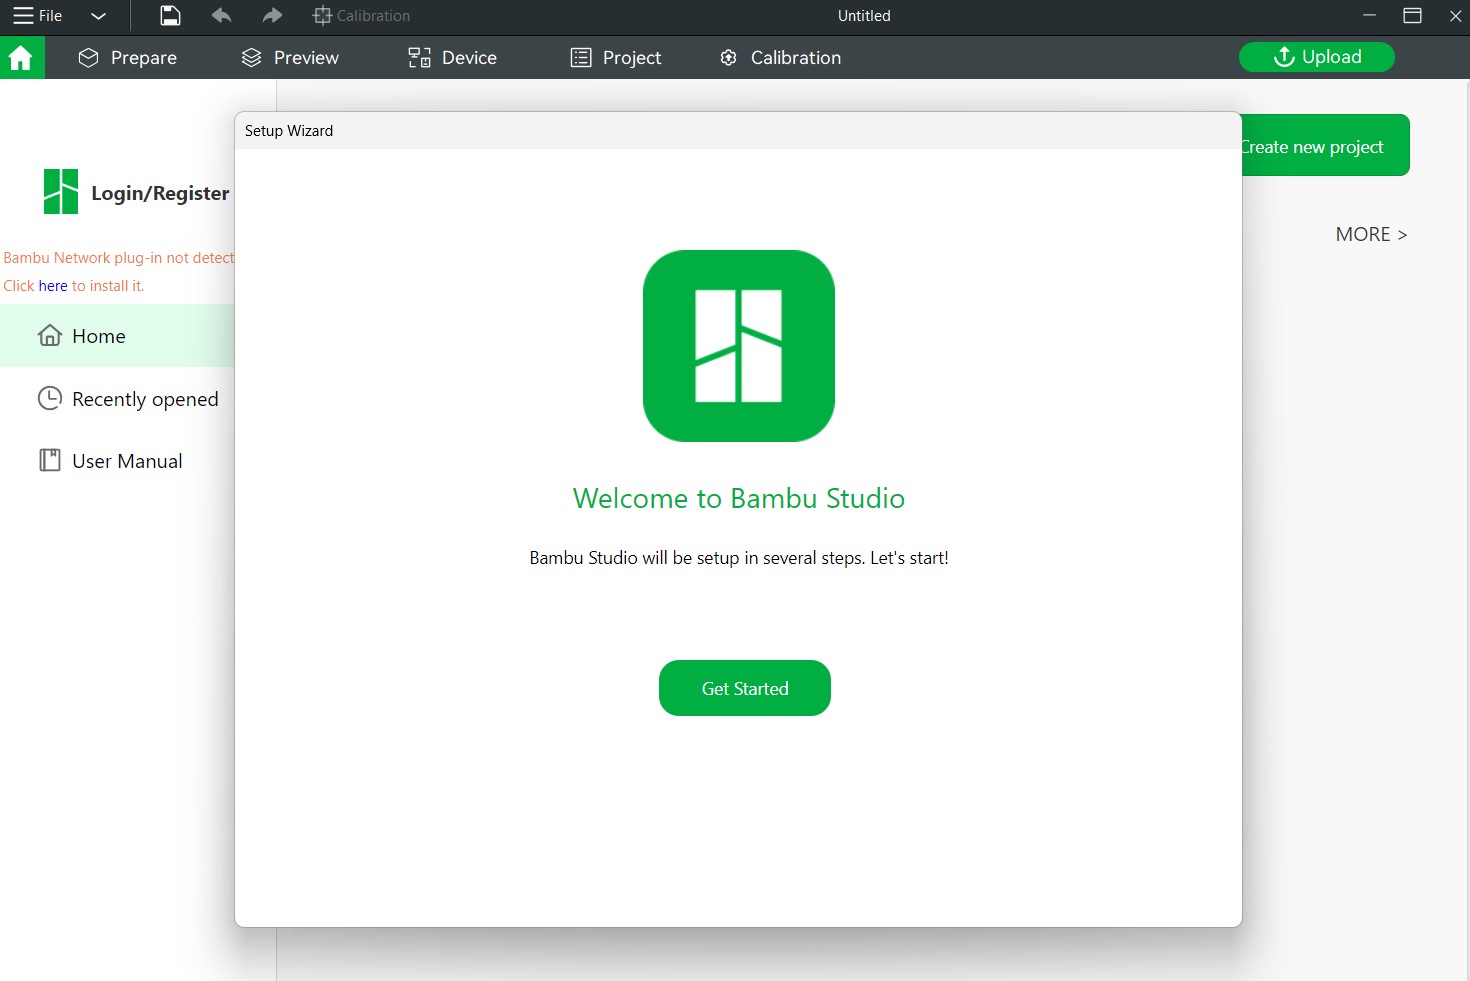
4. Once Completed click next, then close the installer, Bambu Studio set up wizard should open.
5. Uncheck all printers, besides the A1 mini

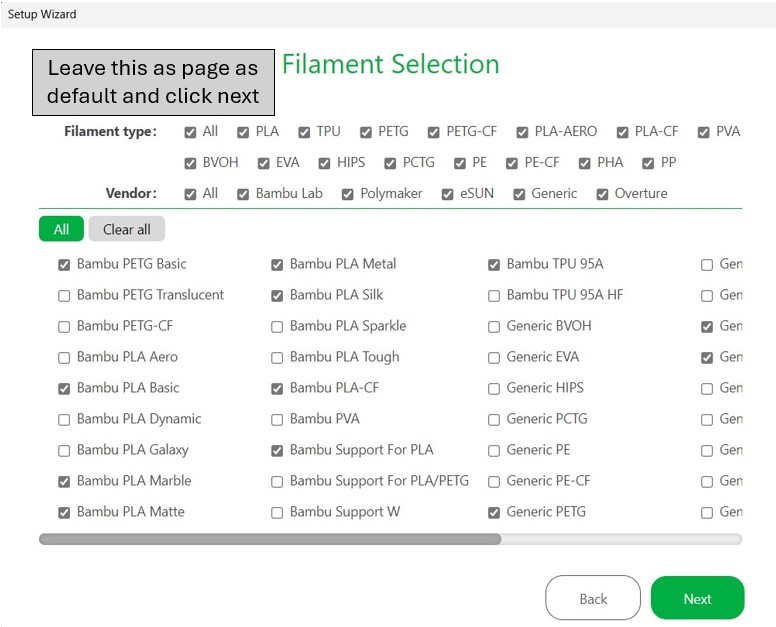
6. Leave all material selections as default.
7. Install Network Plugin to get access to online models
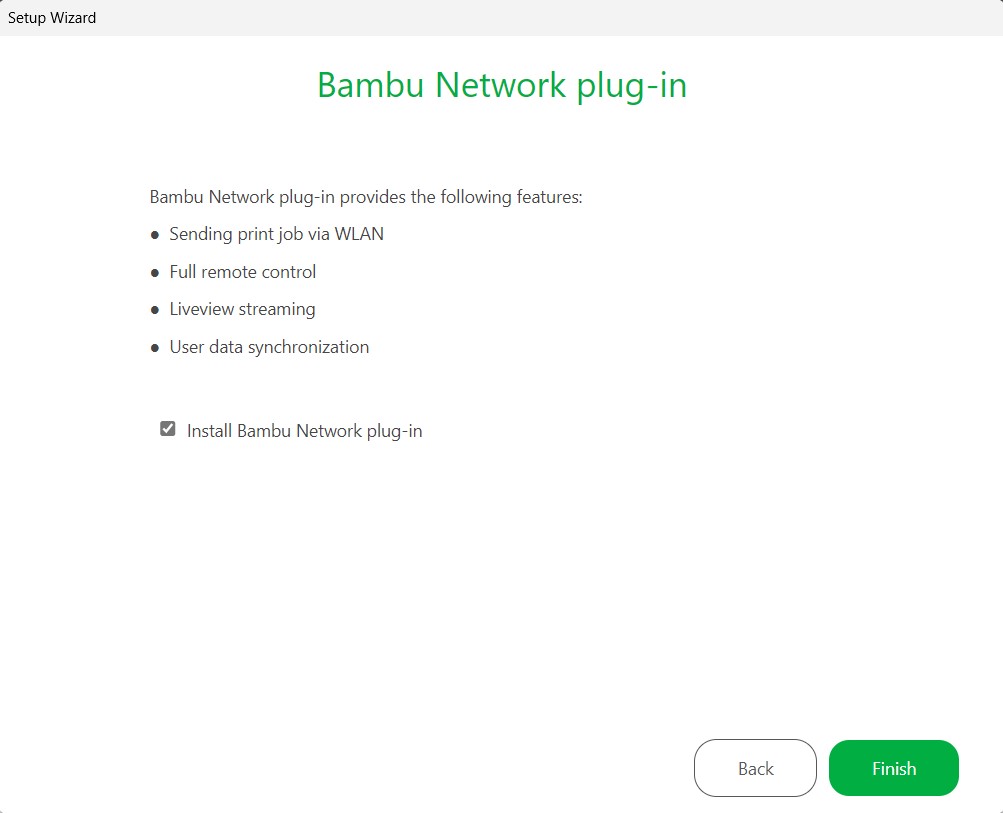
8. Click Finish
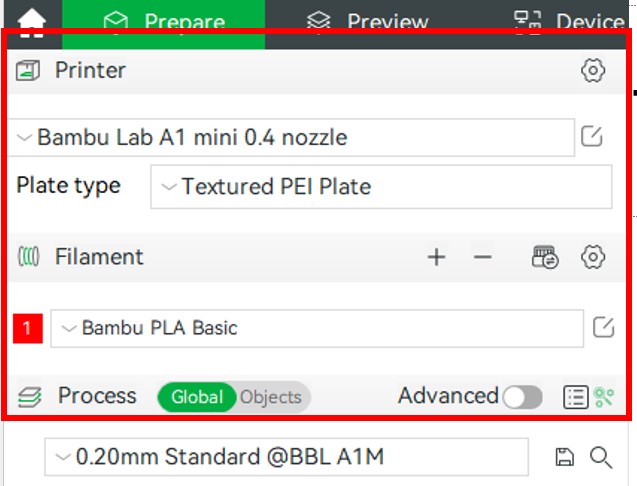
Overview
The printer and material settings allow you to quickly change between different printers, base plates, and material types. For our use case, always make sure that the the printer is set to the A1 mini. (If you go through and slice with a different printer setting, the part will not load on the printer.)
The different plate types we have available are the textured PEI plate and the smooth PEI plate. The other plate type options we currently do not have.
Material
The material settings are important settings to be aware of when 3D printing. This is where the material can be changed and printing temperatures can be changed. IMPORTANT: DO NOT CHANGE THE DEFAULT VALUES WITHOUT AN INSTRUCTORS PERMISSION. Changing these values can damage the machine.
Material Type
Bambu Studio has preset materials for all of the materials that are supported on the A1 Minis. Below is a brief summary of a couple of those material and there best use cases. If you wish to print with a different material other than PLA, please talk to your TA. For a material guide, check out Bambu Labs Filament Guide.
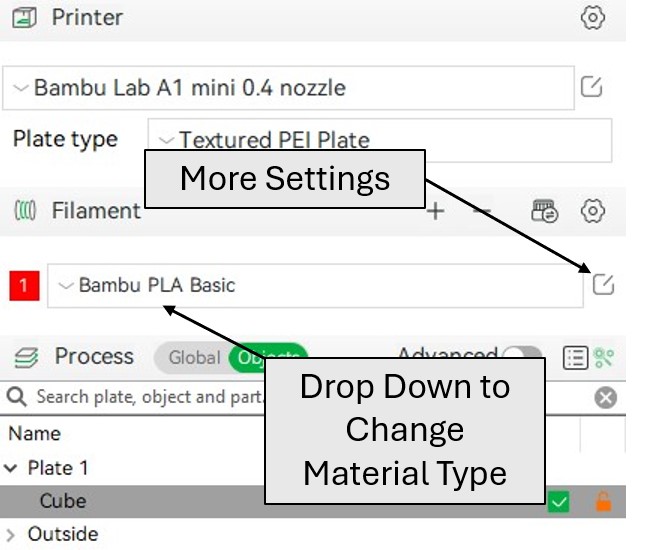
Figure 1. Drop Down menu to change material type.
PLA
PLA (Polylactic Acid) is ideal for early prototyping and modeling as it is easy to print with, supports very fast printing speeds, and create highly detailed and smooth prints. PLA is also low cost and produces minimal wear on printer nozzles. However, PLA is far less durable and lacks heat-resistant properties, making it less desirable for functioning parts under high stress and temperature.
PETG
PETG (Polyethylene Terephthalate Glycol) is a versatile material known for its strength, durability, and ease of use. PETG offers more flexibility, impact resistance, and some heat resistance than PLA. PETG is also chemically resistant making it desirable for some chemical applications. PETG is a better choice than PLA for any parts that are will be under higher stress conditions. However, PETG is a little more tricky to print with than PLA and may require some trial and error to get a high quality print.
TPU
TPU (Thermoplastic Polyurethane) is a flexible and durable 3D printing material known for its elasticity and abrasion resistance. TPU parts have the ability to bend, stretch, and withstand high impacts. TPU can be used to print things such as seals, protective covers, flexible hinges, etc. due to its elastic properties. TPU needs to be printed at low speeds but can be an excellent choice where strength, flexibility, and functionality are desirable.
Overview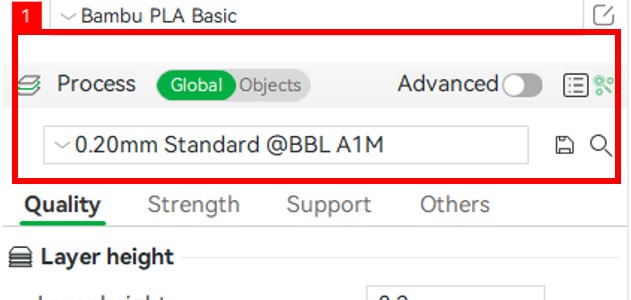
Bambu Studio has various profiles that allow a user to quickly change a preset and print. These for the most part are a combination of different layer heights and printing speeds. The layer height values vary from 0.08 mm to 0.28 mm or extra fine to draft quality. This can be helpful for creating very high detailed parts, or making a part very fast. (Draft quality can be up to 3.5 times faster than extra fine quality). Figures 1 and 2 shows this menu with all the available presents and the affects on printing. (Note: Have to have model selected and be under the global tab.)
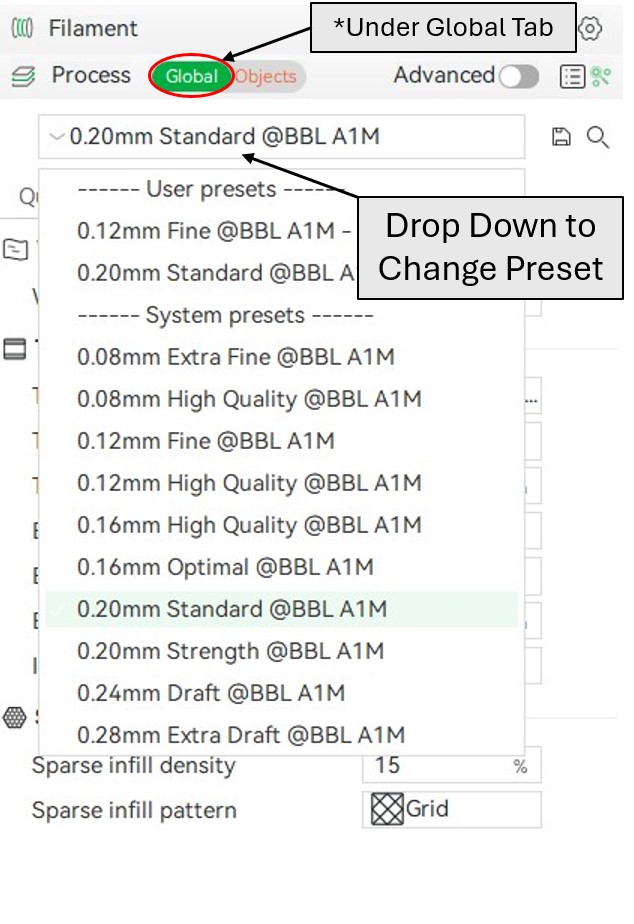
Figure 1. All the default presets available in Bambu Studio.
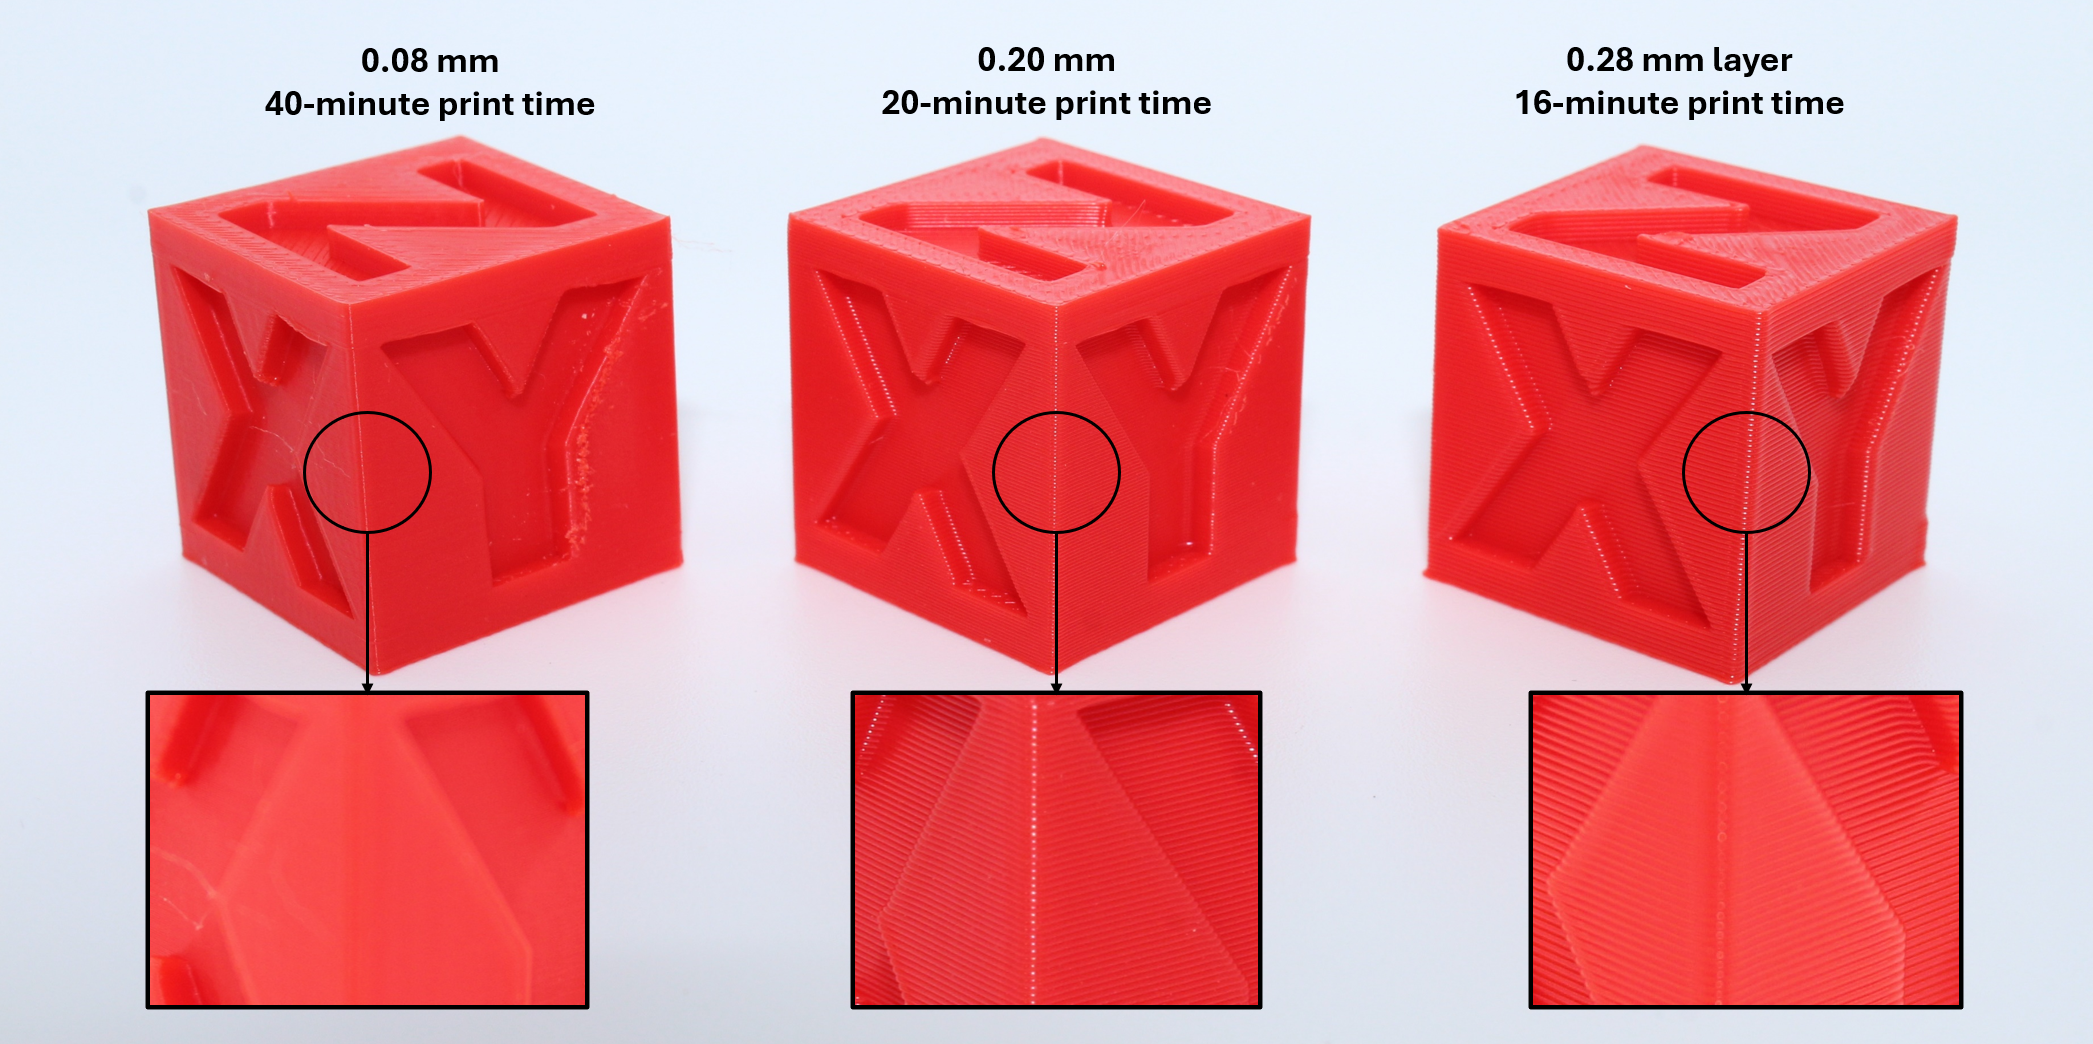
Figure 2. Layer heights and print times for a calibration cube (15% infill).
Overview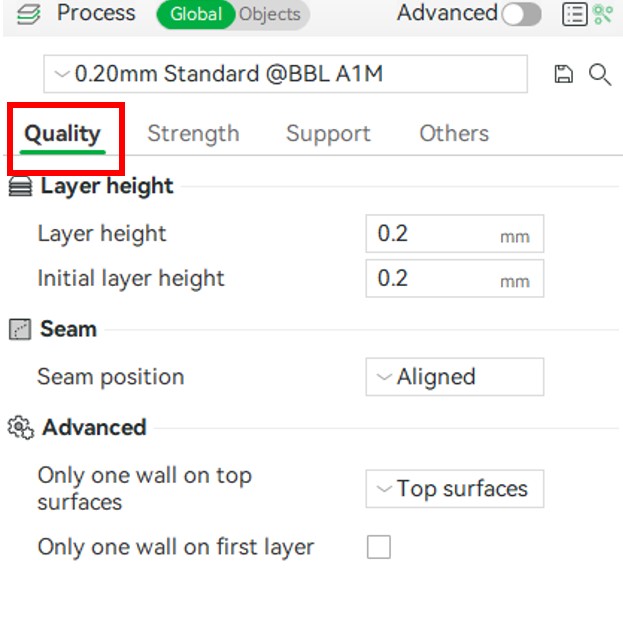
The Quality tab on the left side when a model is selected allows the layer height, seam position and wall settings to be tweaked. These settings are important as they have a large effect on the print time as well as the detail in a print.
Layer Height
The layer height is the thickness of an individual layer of material the printer lays down. This directly affects the quality and speed of the print. A typical layer height is around 0.2mm, but can range from 0.08 mm (extra fine) to 0.28mm (super draft). The larger this value is, the faster the print, but then there will less detail in the z-axis.

Figure 1. The print times and visible layer heights of the same calibration cube.
Seam Position
Seam Position refers to the location of where the seam is in the print. The seam is where a new layer starts on a print which can lead to a small bump on the print. The seam is especially noticeable on cylindrical parts.
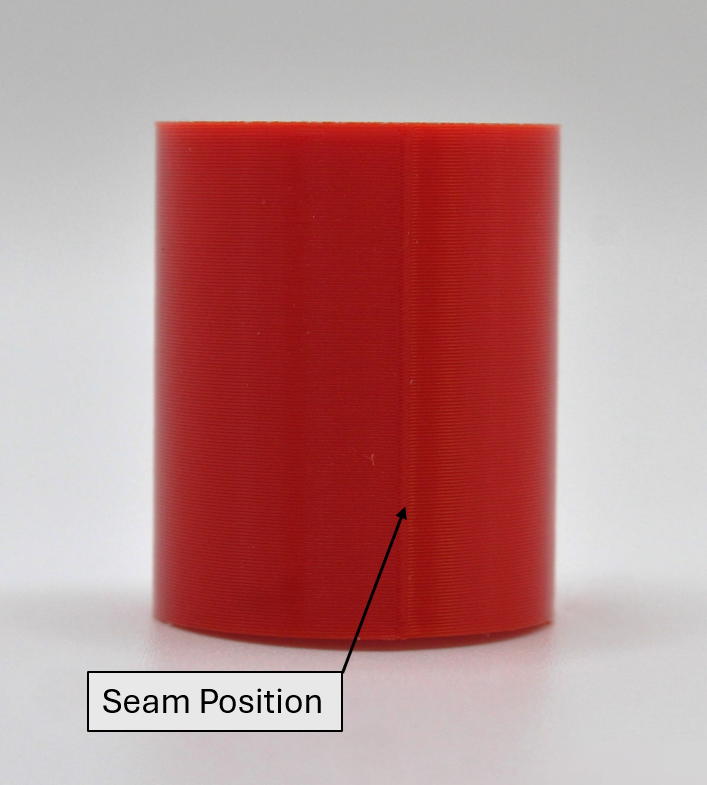
Figure 2. The seam position shown above runs the entire length of the part in the vertical (Z) axis.
In Bambu Studio, there is four different seam position settings, Near, Back, Aligned, and Random. Near and Back place the the seam closest or furthest to the front of the build plate on the model. The Aligned setting will put the seam somewhere on the part where it can most closely be in 1 line for the entire length of the part. The Random setting will just randomly choose a spot to start the new layer, which can be beneficial depending on the desired outcome (see figure 3).
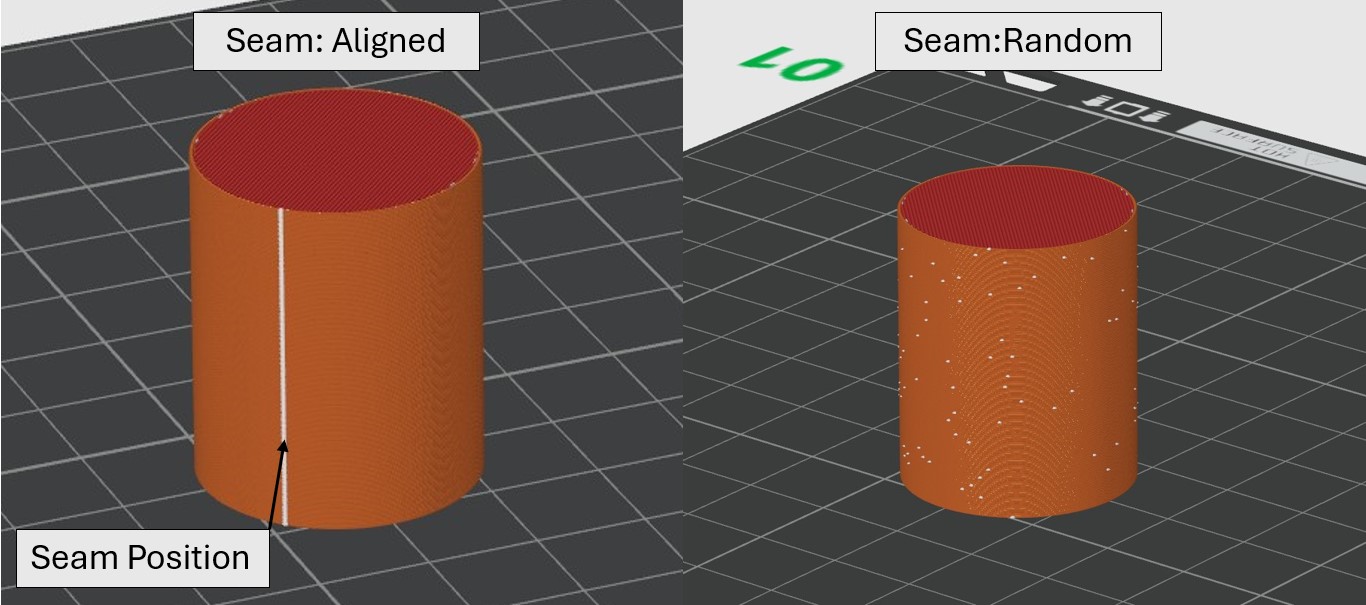
Figure 3. The seam position on with the aligned setting and the random setting.
Wall Surface Settings
The final setting under the quality tab has to do with the top and bottom wall surfaces. This setting allows you to change how many perimeter walls (wall loops) there are on the top (or bottom) surfaces in order to get the best surface finish. There is 3 settings here: Topmost Surface, Top Surfaces, and Not Applied, as well as a check box to apply one wall on the bottom layer. If Topmost surface or top surfaces is selected, there will only be one wall loop on the Top Surface. The Not Applied setting will simply apply the number of wall loops set under the strength tab (see figure 4).

Figure 4. Top Surface setting versus Not Applied Setting with five wall loops
Overview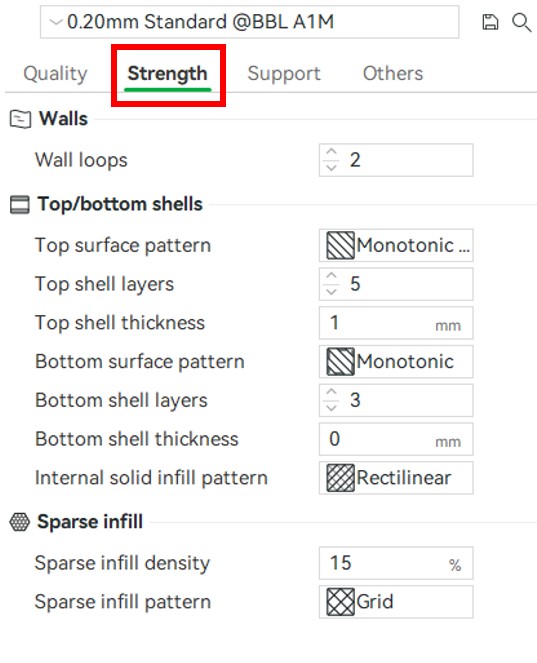
The strength tab is how the part strength is determined. Here the number of walls, top and bottom shells and infill pattern and density can be modified to make a part as strong as it needs to be. As with everything in 3D printing, there is a balance between part strength and material usage and print time. The stronger the print, the more material there is and the longer print time an object has.
Walls
The walls setting is the number of solid layers on the outside of a part before the infill pattern starts. A typical value here is between 3-5 walls. A value much higher than this can be unnecessary and a value less than this would yield a weak part. Figure 1 shows a cross section of a calibration cube with the wall loops setting set to two and five.
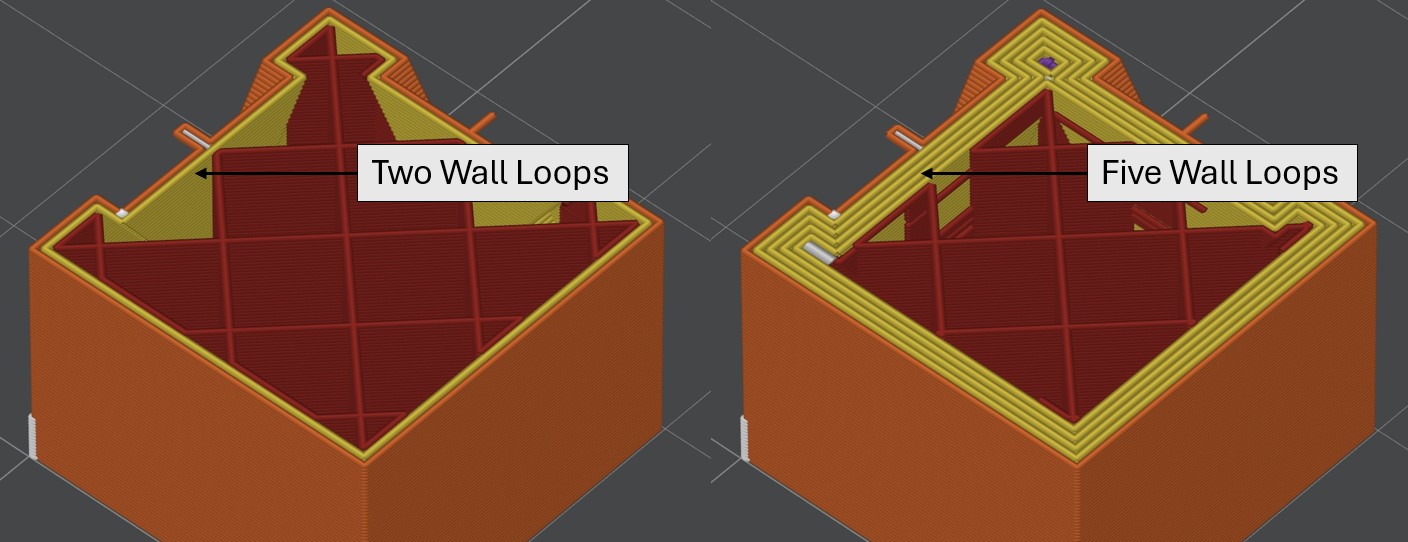
Figure 1. Two wall loops versus five wall loops
Top and Bottom Shells
The shell settings is how many solid layers on the top and bottom before the infill starts and stops. A typical value here is also 3-5. The surface pattern can also be set, however this is almost entirely aesthetic.
Sparse Infill
Infill is the internal structure and pattern used on the interior of a print. Infill has two main settings that can be changed, density and pattern. Density is how solid the interior is (0% being hollow and 100% being solid). A typical density setting is between 10% and 50%. Values here offer a good balance between material usage and strength. Figure 2. Shows a cross section of different infill percentages.
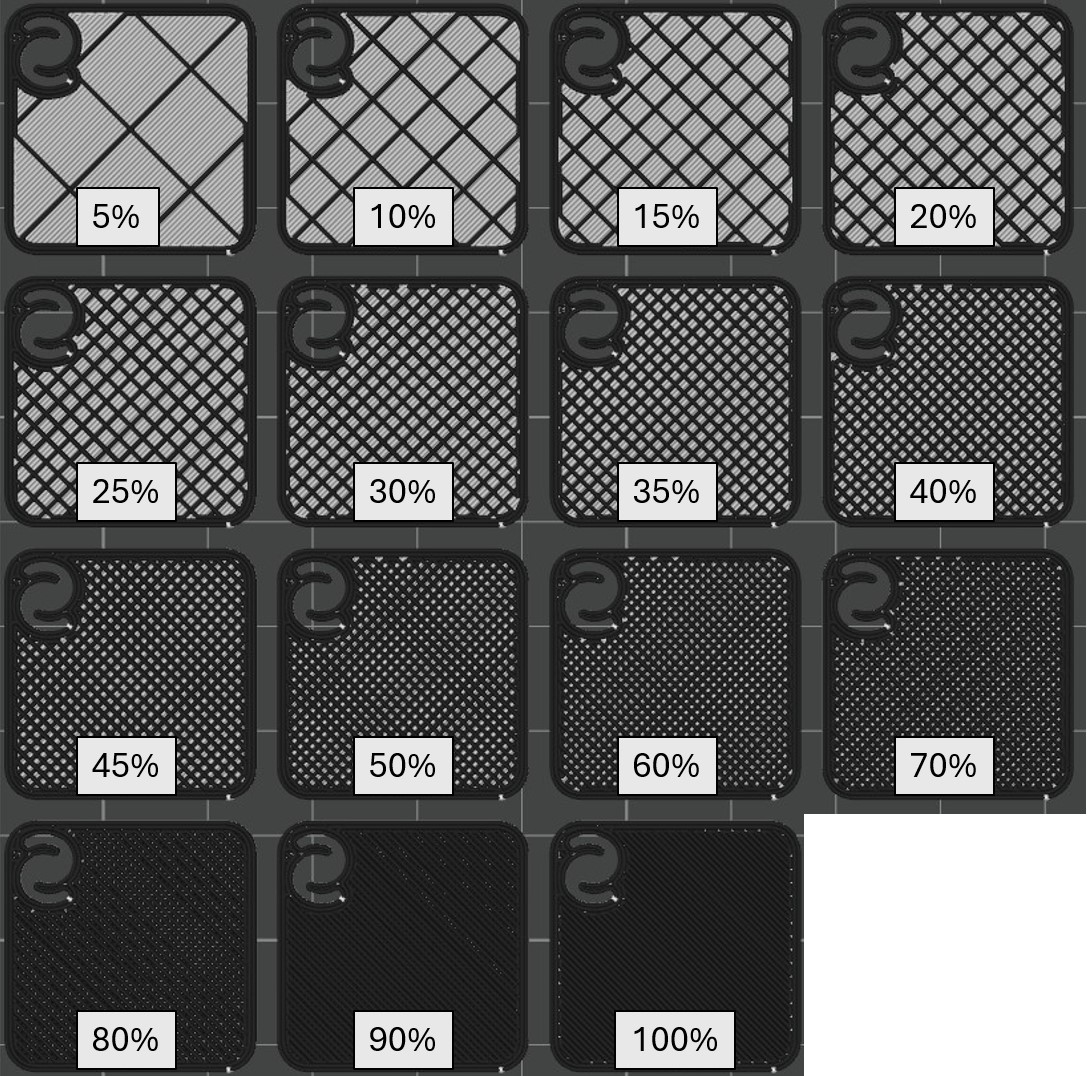
Figure 2. Infill percentages for the grid infill from 5% to 100%(solid). Model Credit: EmE Creative Lab
Infill Patterns
The infill pattern for the most part is a personal preference however some infills offer more strength than others. Additionally some infills use more material then others and extended printing times. Some good infill pattern choices that offer a good balance between strength and cost are: Grid, Adaptive Cubic, Gyroid, and Tri-Hexagon. Figure 3 below shows most of the available infill patterns in Bambu Studio.
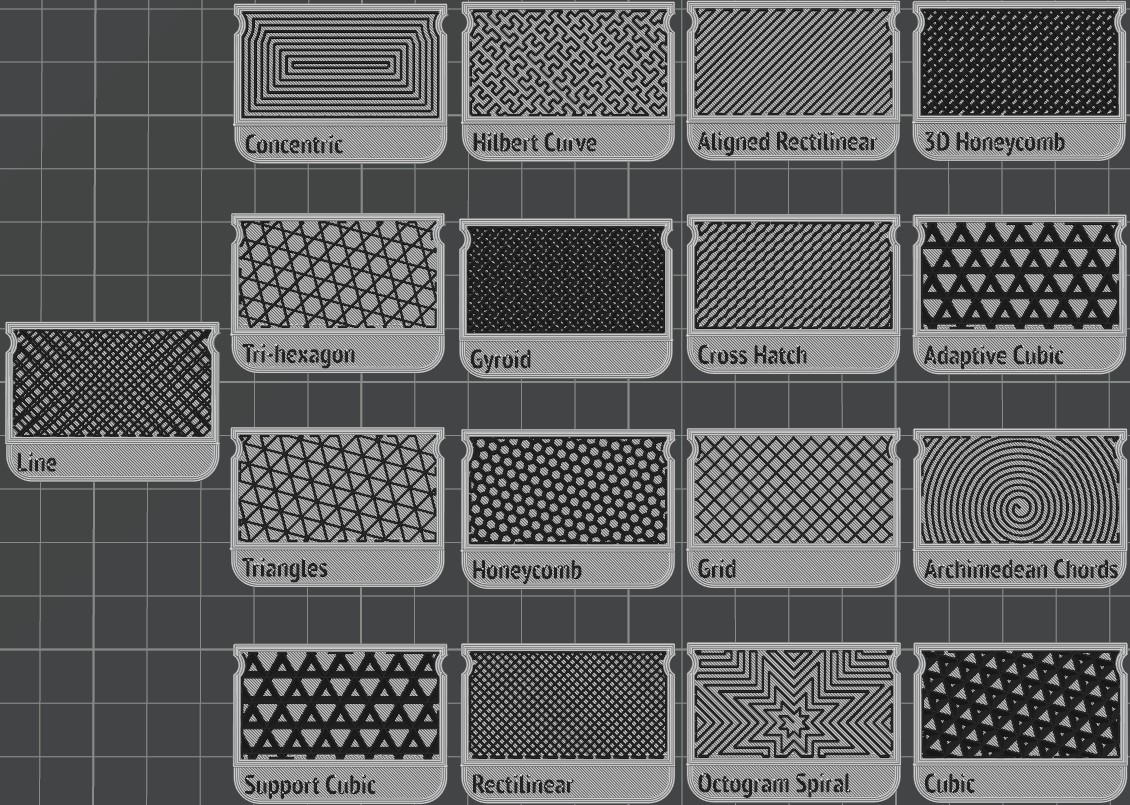
Figure 3. Infill Patterns in Bambu Studio at 35% infill. (Lightning Infill pattern not included)
Overview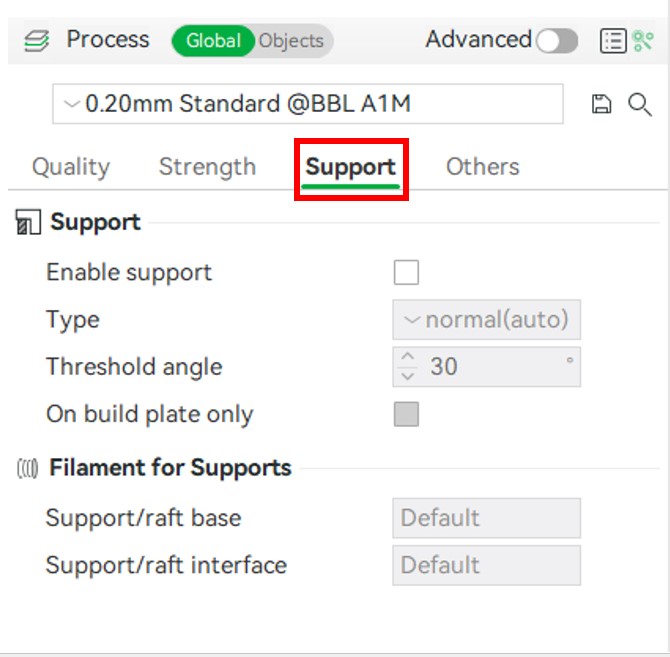
The support settings are important settings if the print contains any overhangs. Typically, any overhang that has a slope greater than 45 percent will need supports. In Bambu Studio, you can set this angle and have the slicer auto generate the supports, or you can paint the supports in manually. Figure 1. shows when supports are needed.
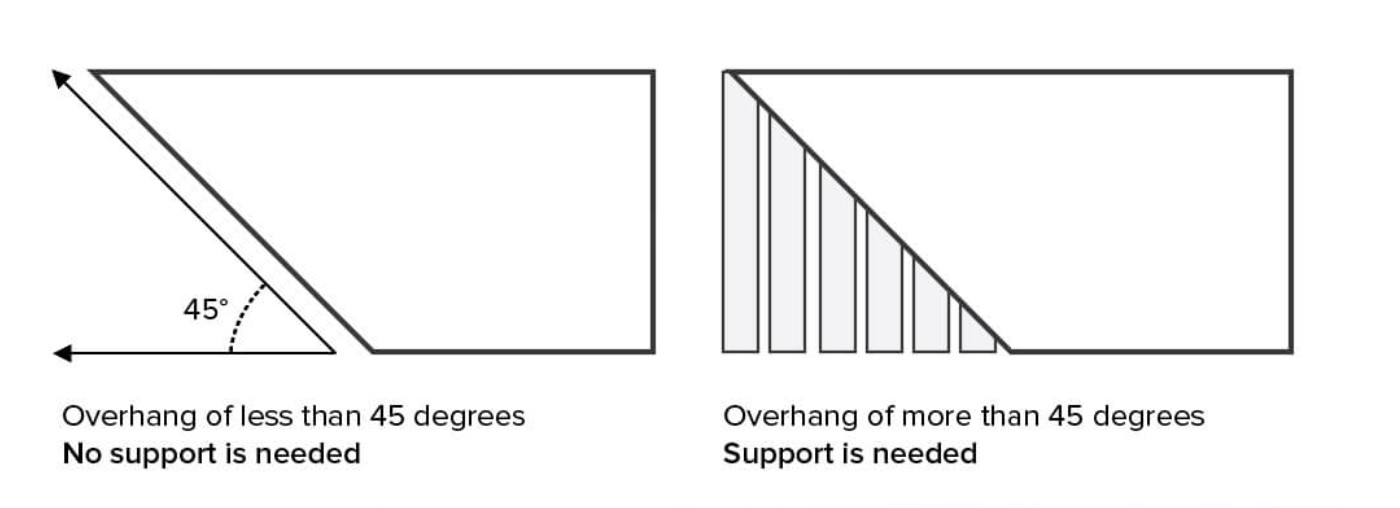
Figure 1. The 45 degree overhang rule for determining if supports are necessary or not. (Image Source: 3D Hubs)
Support Types
There is two types of support generation in Bambu Studio, tree supports, and normal supports. Tree supports are typically the better choice as they use less material and are usually significantly easier to remove compared to normal supports. However, Tree supports offer less support and leave a slightly rougher surface finish. There is also the manual mode of both support types which is to be used with support painting. Figure 2 shows the two different support types printed off the A1 mini. More Information on Support Types
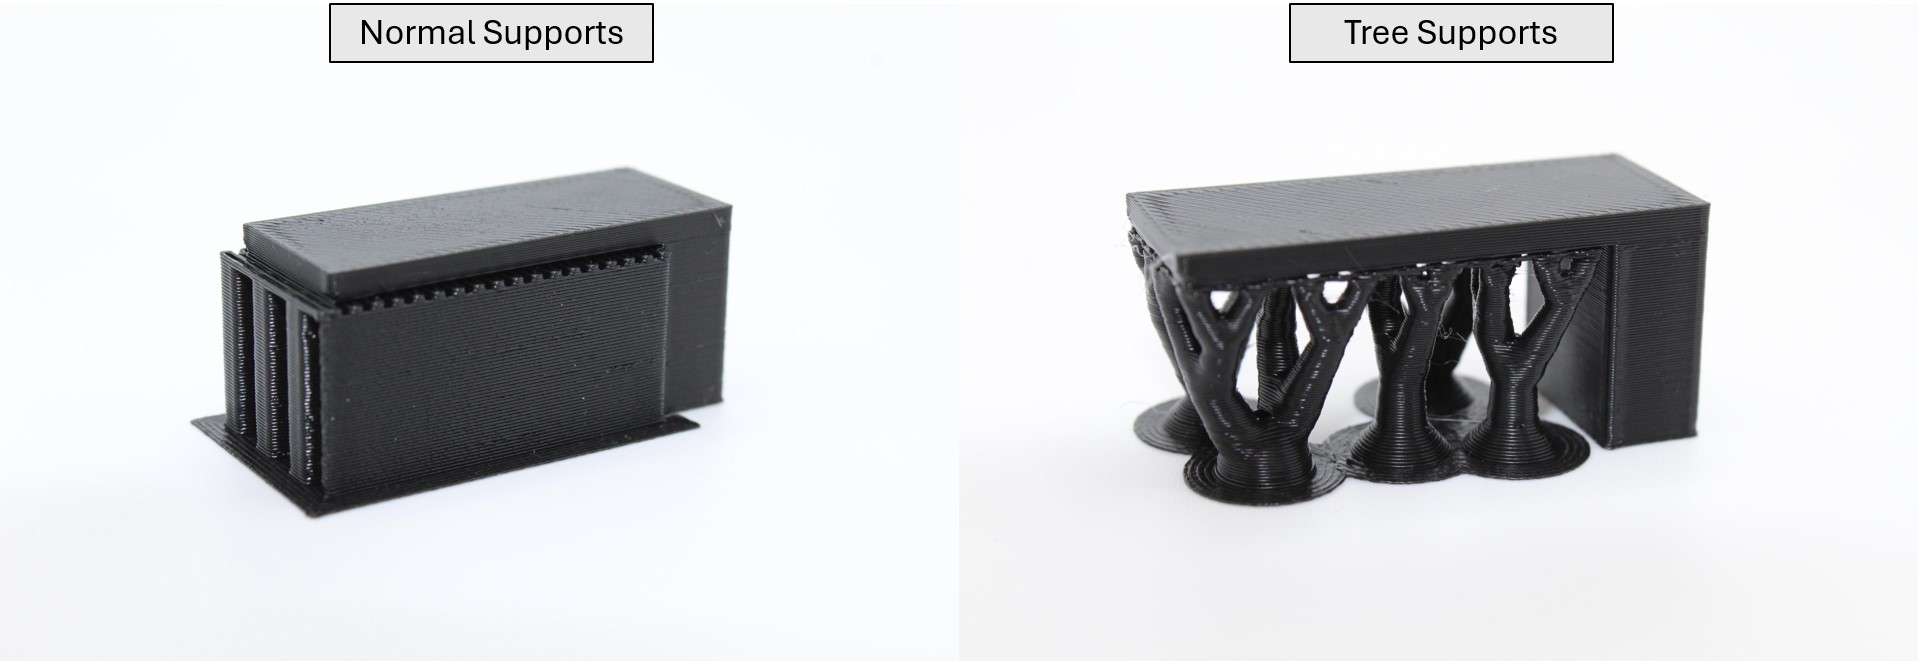
Figure 2. Normal and Tree support types
Painting Supports
Bambu Studio allows you to paint supports on your model where supports will only be applied to the painted area offering manual control over support location. This can be incredibly helpful if your model has overhangs that need support, as well as internal cavities that do not require support or where removing supports would be difficult or impossible. Figure 3 shows how support painting works in Bambu Studio.
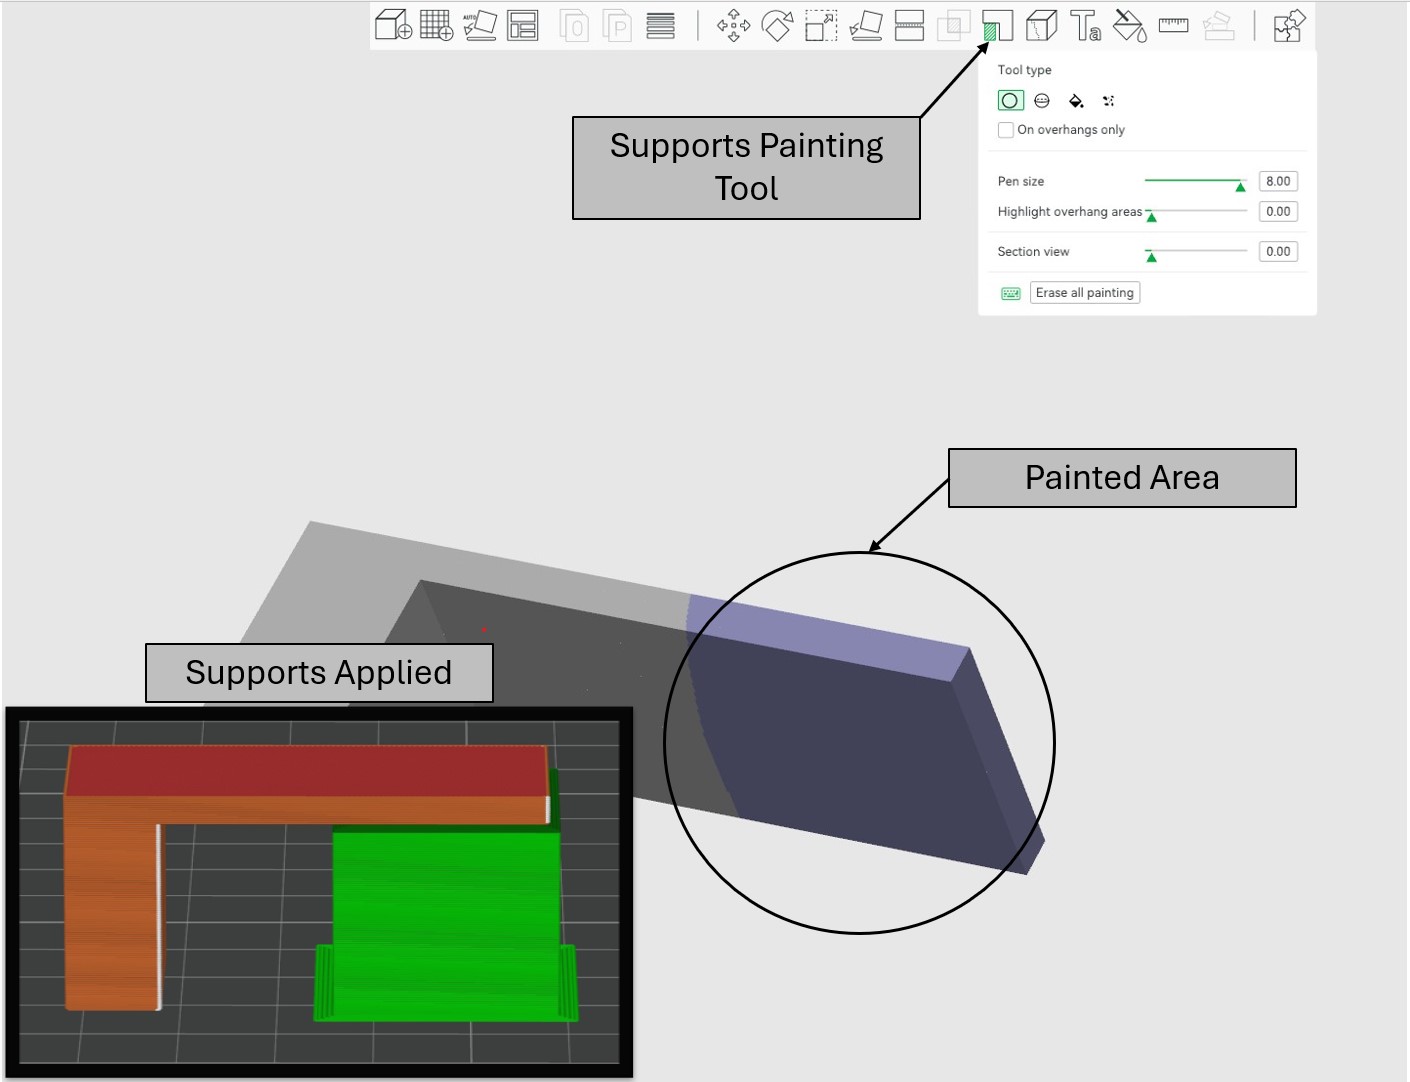
Figure 3. Shows the support painting process and how the supports are applied during slicing.
Other Settings
When in the auto mode, the threshold angle is the overhang angle where supports will be generated. 3D printers can print up to 40 degrees without too much effect on quality. Typically a value of 40 percent results in high quality prints and lower amounts of wasted material.
The “On build plate only” check box can be a helpful tool when using tree type supports. This ensures that all supports will start on the build plate and not on the model itself. This is helpful as when supports start on the model it leaves residual plastic on the part, which can be a hassle to remove during post-processing.
Overview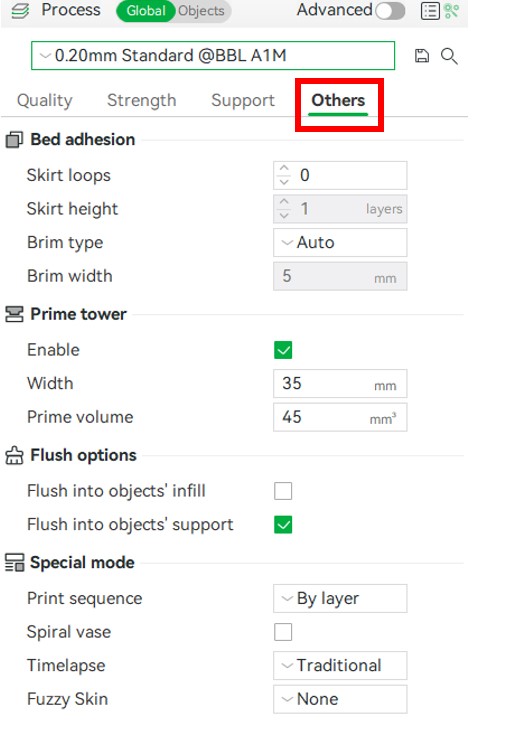
The other tab includes bed adhesion settings, prime tower settings, and some other settings that may be helpful. The most useful setting available in the other tab is the bed adhesion settings. This is helpful as sometimes (especially parts with small bed contact area) parts will peel off the bed resulting in failed prints or unwanted artifacts.
Bed Adhesion
There is 2 types of bed adhesion options, a skirt and a brim. A skirt is a loop of filament that surrounds the entire part. This is helpful as an operator can watch the skirt be printed, then know if the bed leveling is correct and there is good adhesion.
The other option is a brim, which is a 1 layer, multi-loop extension which surrounds the part. The brim is then easily peeled off during the post processing phase of printing. A brim gives a part larger surface area and can be an exceptionally helpful tool. There is also different types of brim generation in Bambu Studio, auto, outer brim, inner brim, and outer and inner brim. Auto will automatically generate a brim where the software thinks a brim is needed, i.e. any small contact points. Outer brim only will apply the brim on the outmost area of a part, and an inner brim will only do the innermost area of a part. Figure 1 shows the brim being enabled.
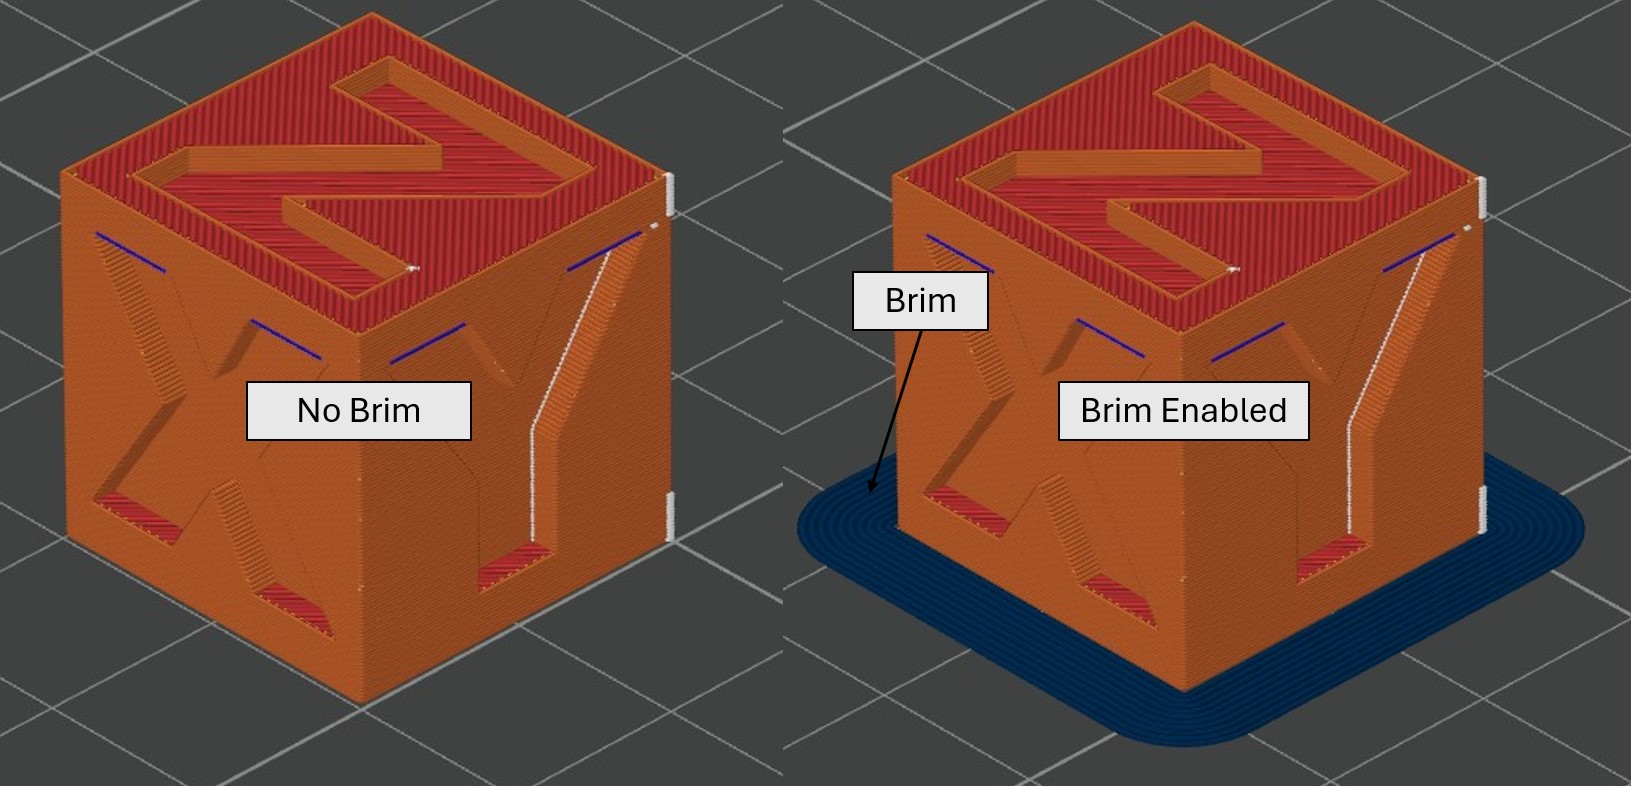
Figure 1. (Left) No brim enabled and (Right) a 5mm brim enabled.
Prime Tower
A prime tower is helpful when printing in multicolor as it “primes” the nozzle to be the right color. We do not have an AMS system and therefore a prime tower is never needed.
Special Modes
The print sequence is something that affects how a model(s) is printed. The default is “By layer” which does the whole plate layer by layer. The other option is by object in which the printer will print one part to completion, then start the next part. We will not use this setting as it can produce issues with crashing the machine.
The spiral vase check box is meant for printing a vase for flowers, and what this does is limit the number of walls and infill settings. This essentially disables retraction in the extruder, meaning there is no visible seam on the print.
The fuzzy skin setting is used for when having a “fuzzy” part is desired.
Now you have successfully completed this module!
Next Module