Overview
In this training module, you will begin to acclimate yourself with the A1 minis by printing a basic part. This tutorial will go over downloading a part from Bambu Studio, slicing, setting up the printer, then printing the part.
- Downloading + Opening a Part
- Slicer Settings
- Exporting
- Starting the Print
- Printing
- Removing the Print
- Post-Processing
Overview
Downloading and opening a .stl file is the how you start the 3D Printing Process almost every time. In this tutorial, the .stl will be provided for you, however in most cases you will export a .stl file from your CAD software such as SolidWorks.
Download
To start, go ahead and download the Wisconsin Fridge Magnet STL file.
Opening Part in Bambu Studio
Once the part is downloaded, go ahead and hit the box with plus sign located on the left side of the tool bar. Then click on the STL file you just downloaded.
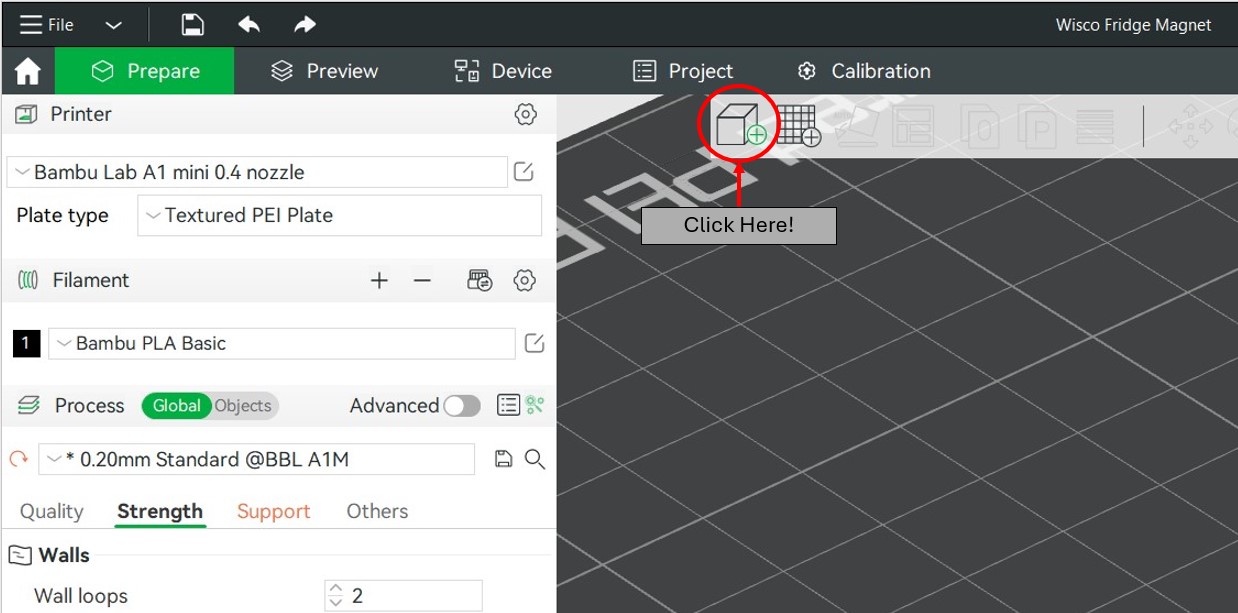
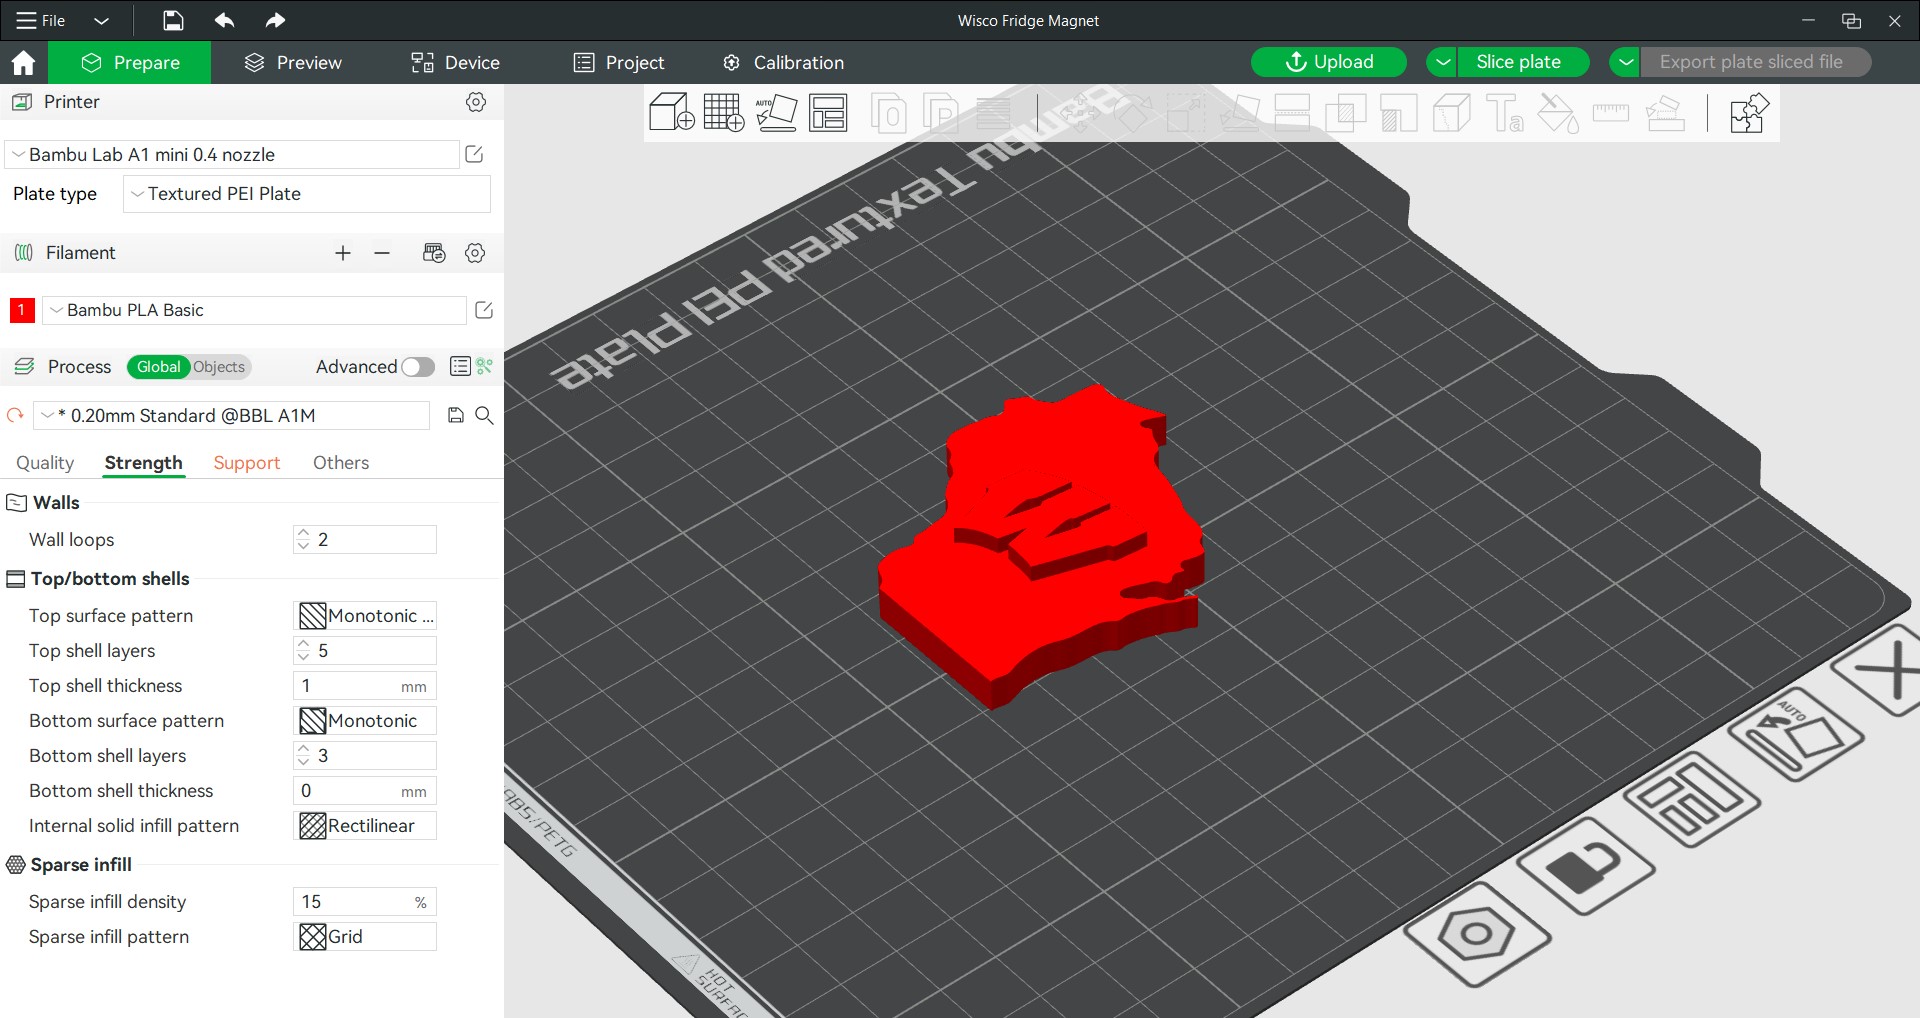
After opening the Part file, your screen should look like this:
Overview
Slicing the part is arguably one of the most important factors in producing a high quality 3D printed part. With this downloading printing profile, the settings are set already, however, it is always good practice to make sure that everything is set right. This practice will help you reduce the amount of failed prints, and make it more likely to get a desired outcome on the first try.
Printer and Material
Make sure that the printer drop down box is selected as “Bambu Lab A1 mini 0.4 nozzle”. If it is set to something else, the A1 minis will not be able to read the file and you will have to start all over.
Under the filament tab, you can delete 3 filament options as we do not have an AMS system and can only print with one color. Make sure that the material is set to Bambu PLA basic, or Generic PLA.
Quality Tab
Layer Height: 0.2mm
Initial Layer Height: 0.2 mm
Seam Position: Aligned
Leave the advanced settings as default
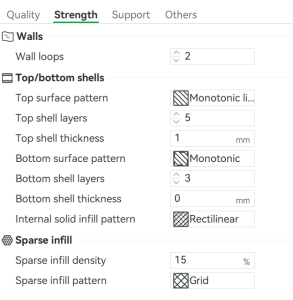
Strength
Use the following settings under the Strength tab
Supports
Enable Supports and choose Tree (auto). (Note: This part does not need supports, however for the sake of demonstration, we will enable them anyways.)
Others
Skirt Loops: 0
Brim Type: Auto
Prime Tower: DISABLED-(only printing with 1 material)
Flush into objects’ infill: Disabled
Print Sequence: By Layer
Leave all other settings as default.
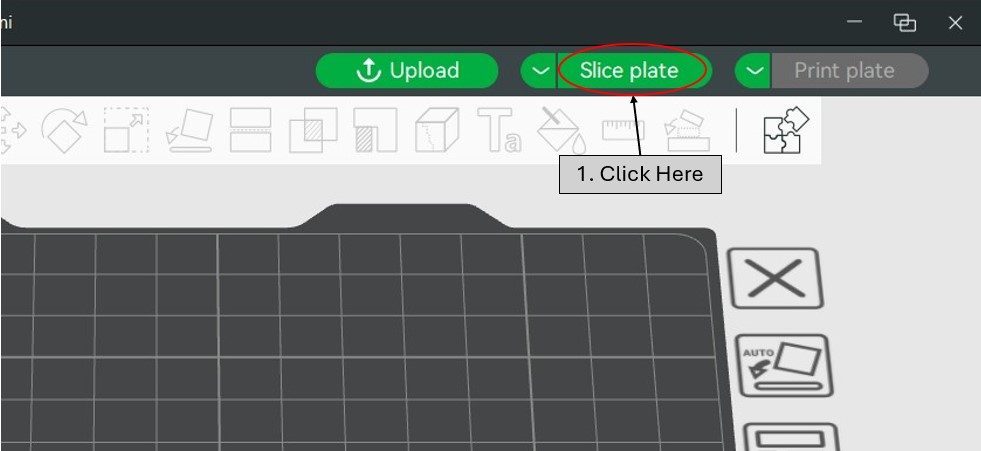
Slicing and Exporting
Click “Slice Plate” in the top right corner then go to the preview tab to look at the sliced file.
Play around with the sliders to see the different layers and inspect the printing process.
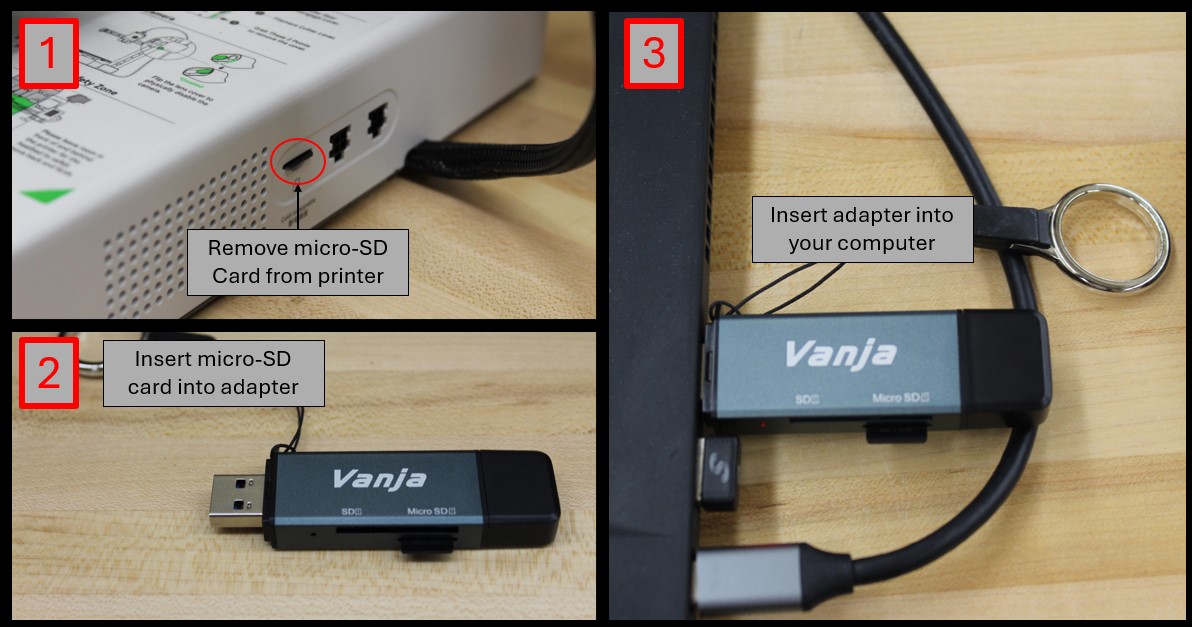
Remove the micro-SD card from the printer and insert it into the adapter. (Note: the adapter has both USB-C and standard USB-A connections.)Insert the micro-SD card adapter into your computer with the printers SD card in the adapter.
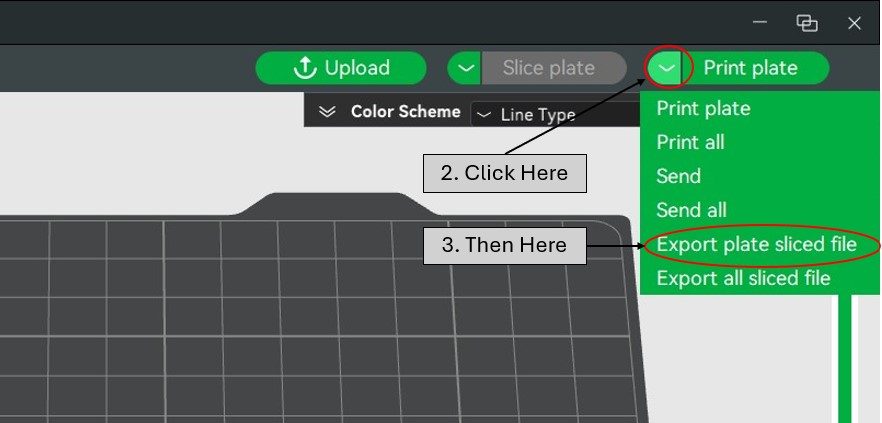
Click the drop down arrow on the Print Plate button and click “Export Plate Sliced File”
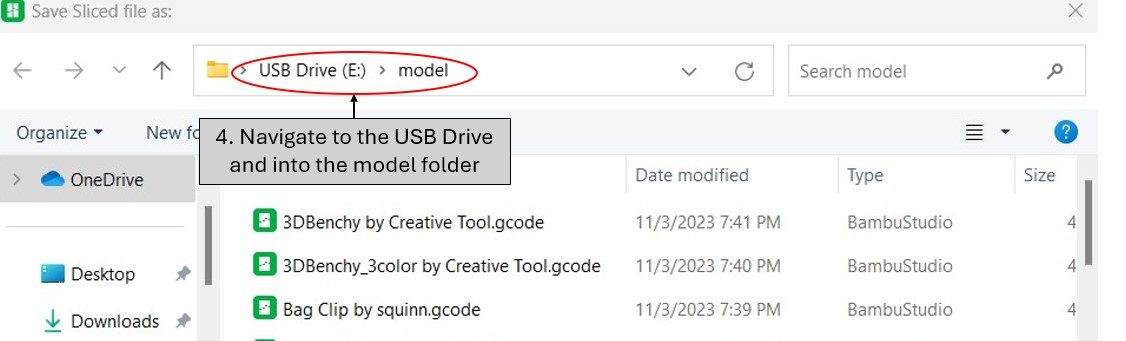
Name the file with your name on it-ex. “Magnet-Bucky Badger”
Then Export the file into the models folder on the USB drive, then remove the SD card.
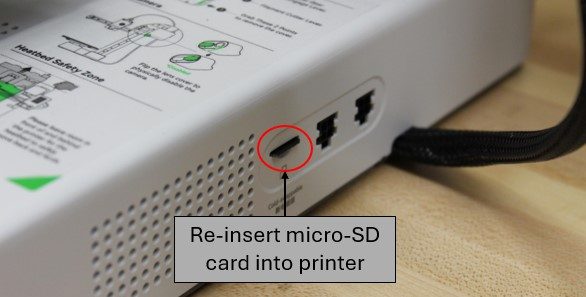
Re-insert the micro-SD card back into the printer.
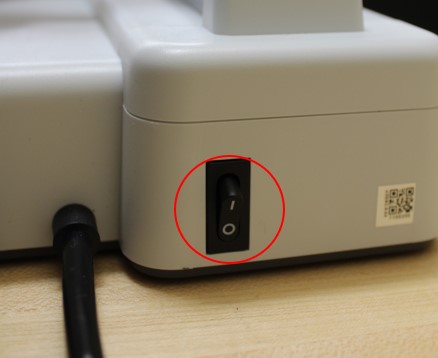
Turn on the printer by flipping the power switch located on the back of the printer.
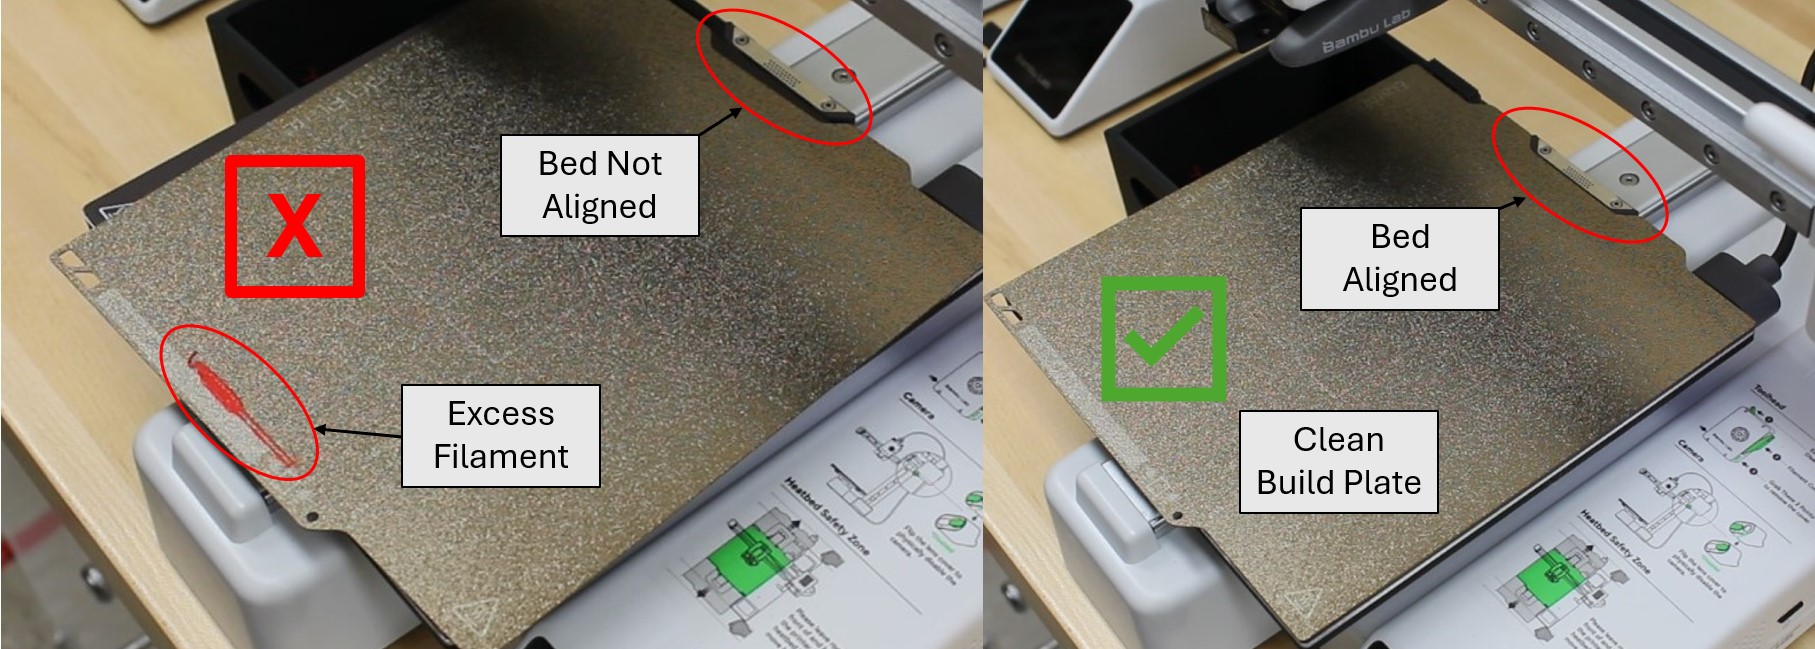
Check the printer to make sure that the build plate is properly aligned on the bed, and is clear of any debris.
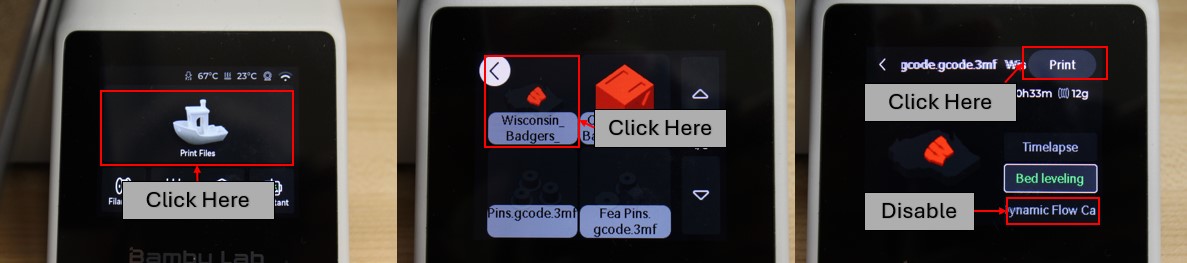
Insert the micro-SD card back into the printer, and click on the “Print Files” box on the control screen.
Click on your part, deselect “Dynamic Flow Calibration” and then click “Print”
The Printer will go through multiple calibration checks, then begin printing the part.
P.S. Do not be alarmed at the loud buzzing that starts soon after the printing part, it is the printer calibrating for vibration compensation, and will only last a few seconds.
During the printing process, the only thing you can really do is watch.
If at any point the model becomes free on the build plate, press the red X on the screen and cancel the print.
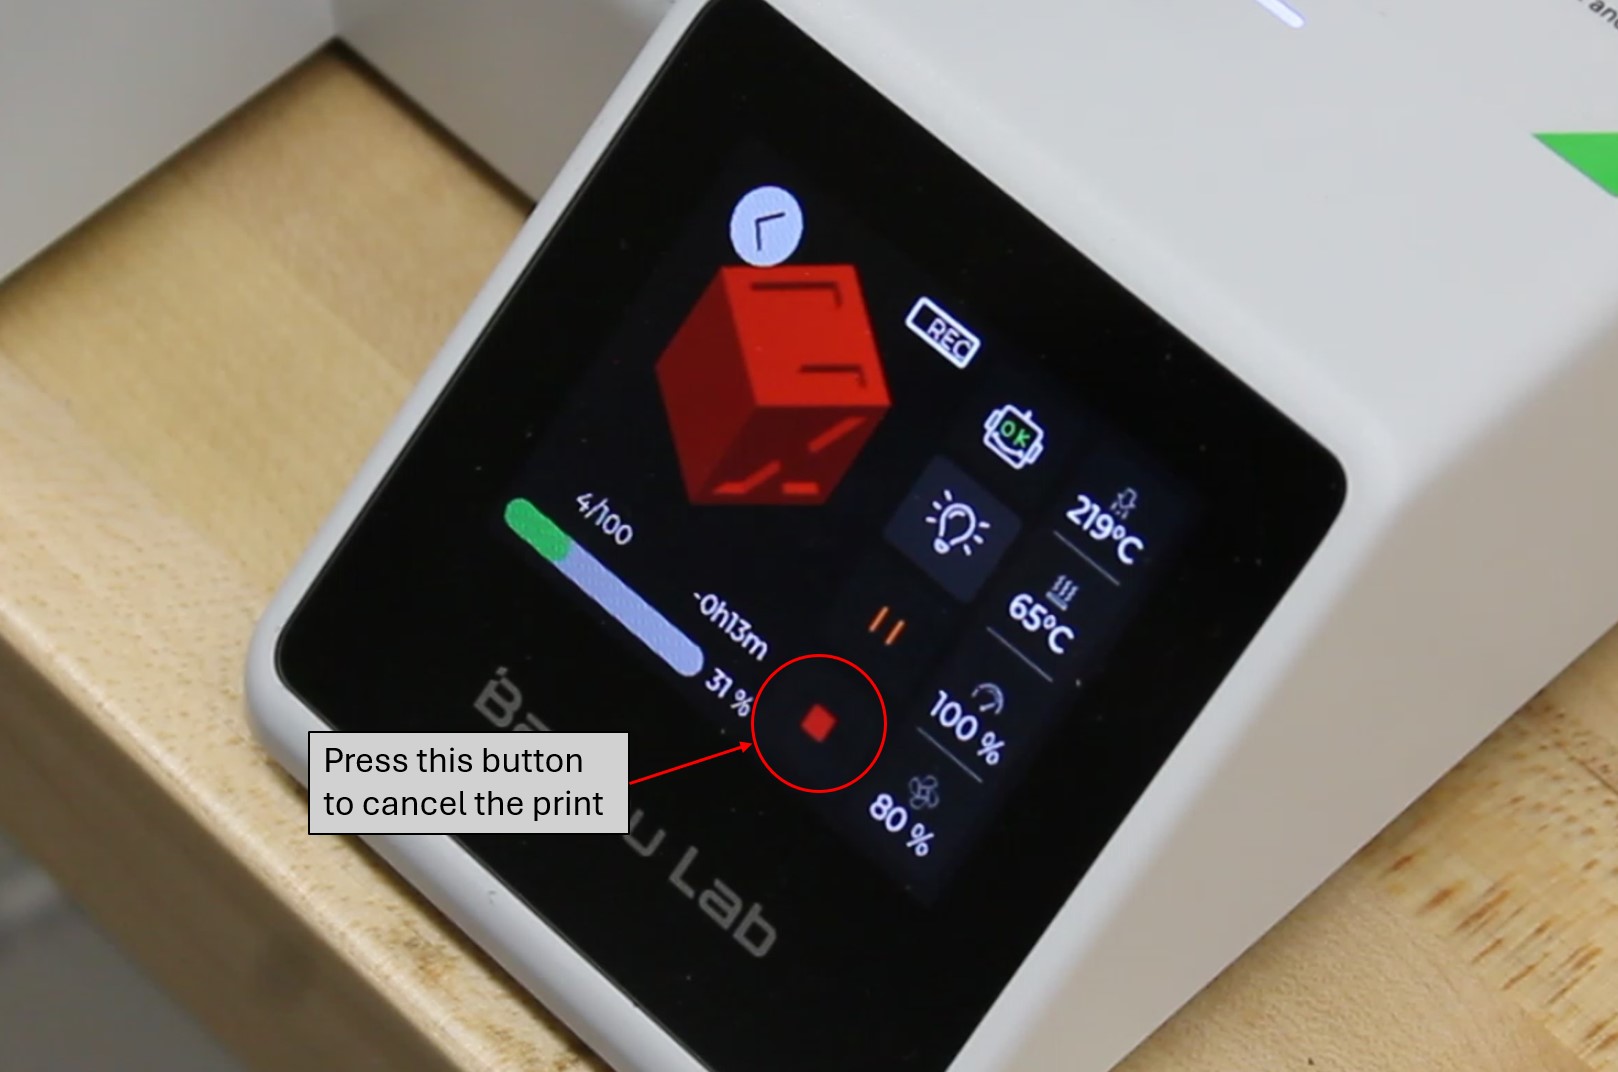
This will cancel the print, and minimizing the material waste and time.
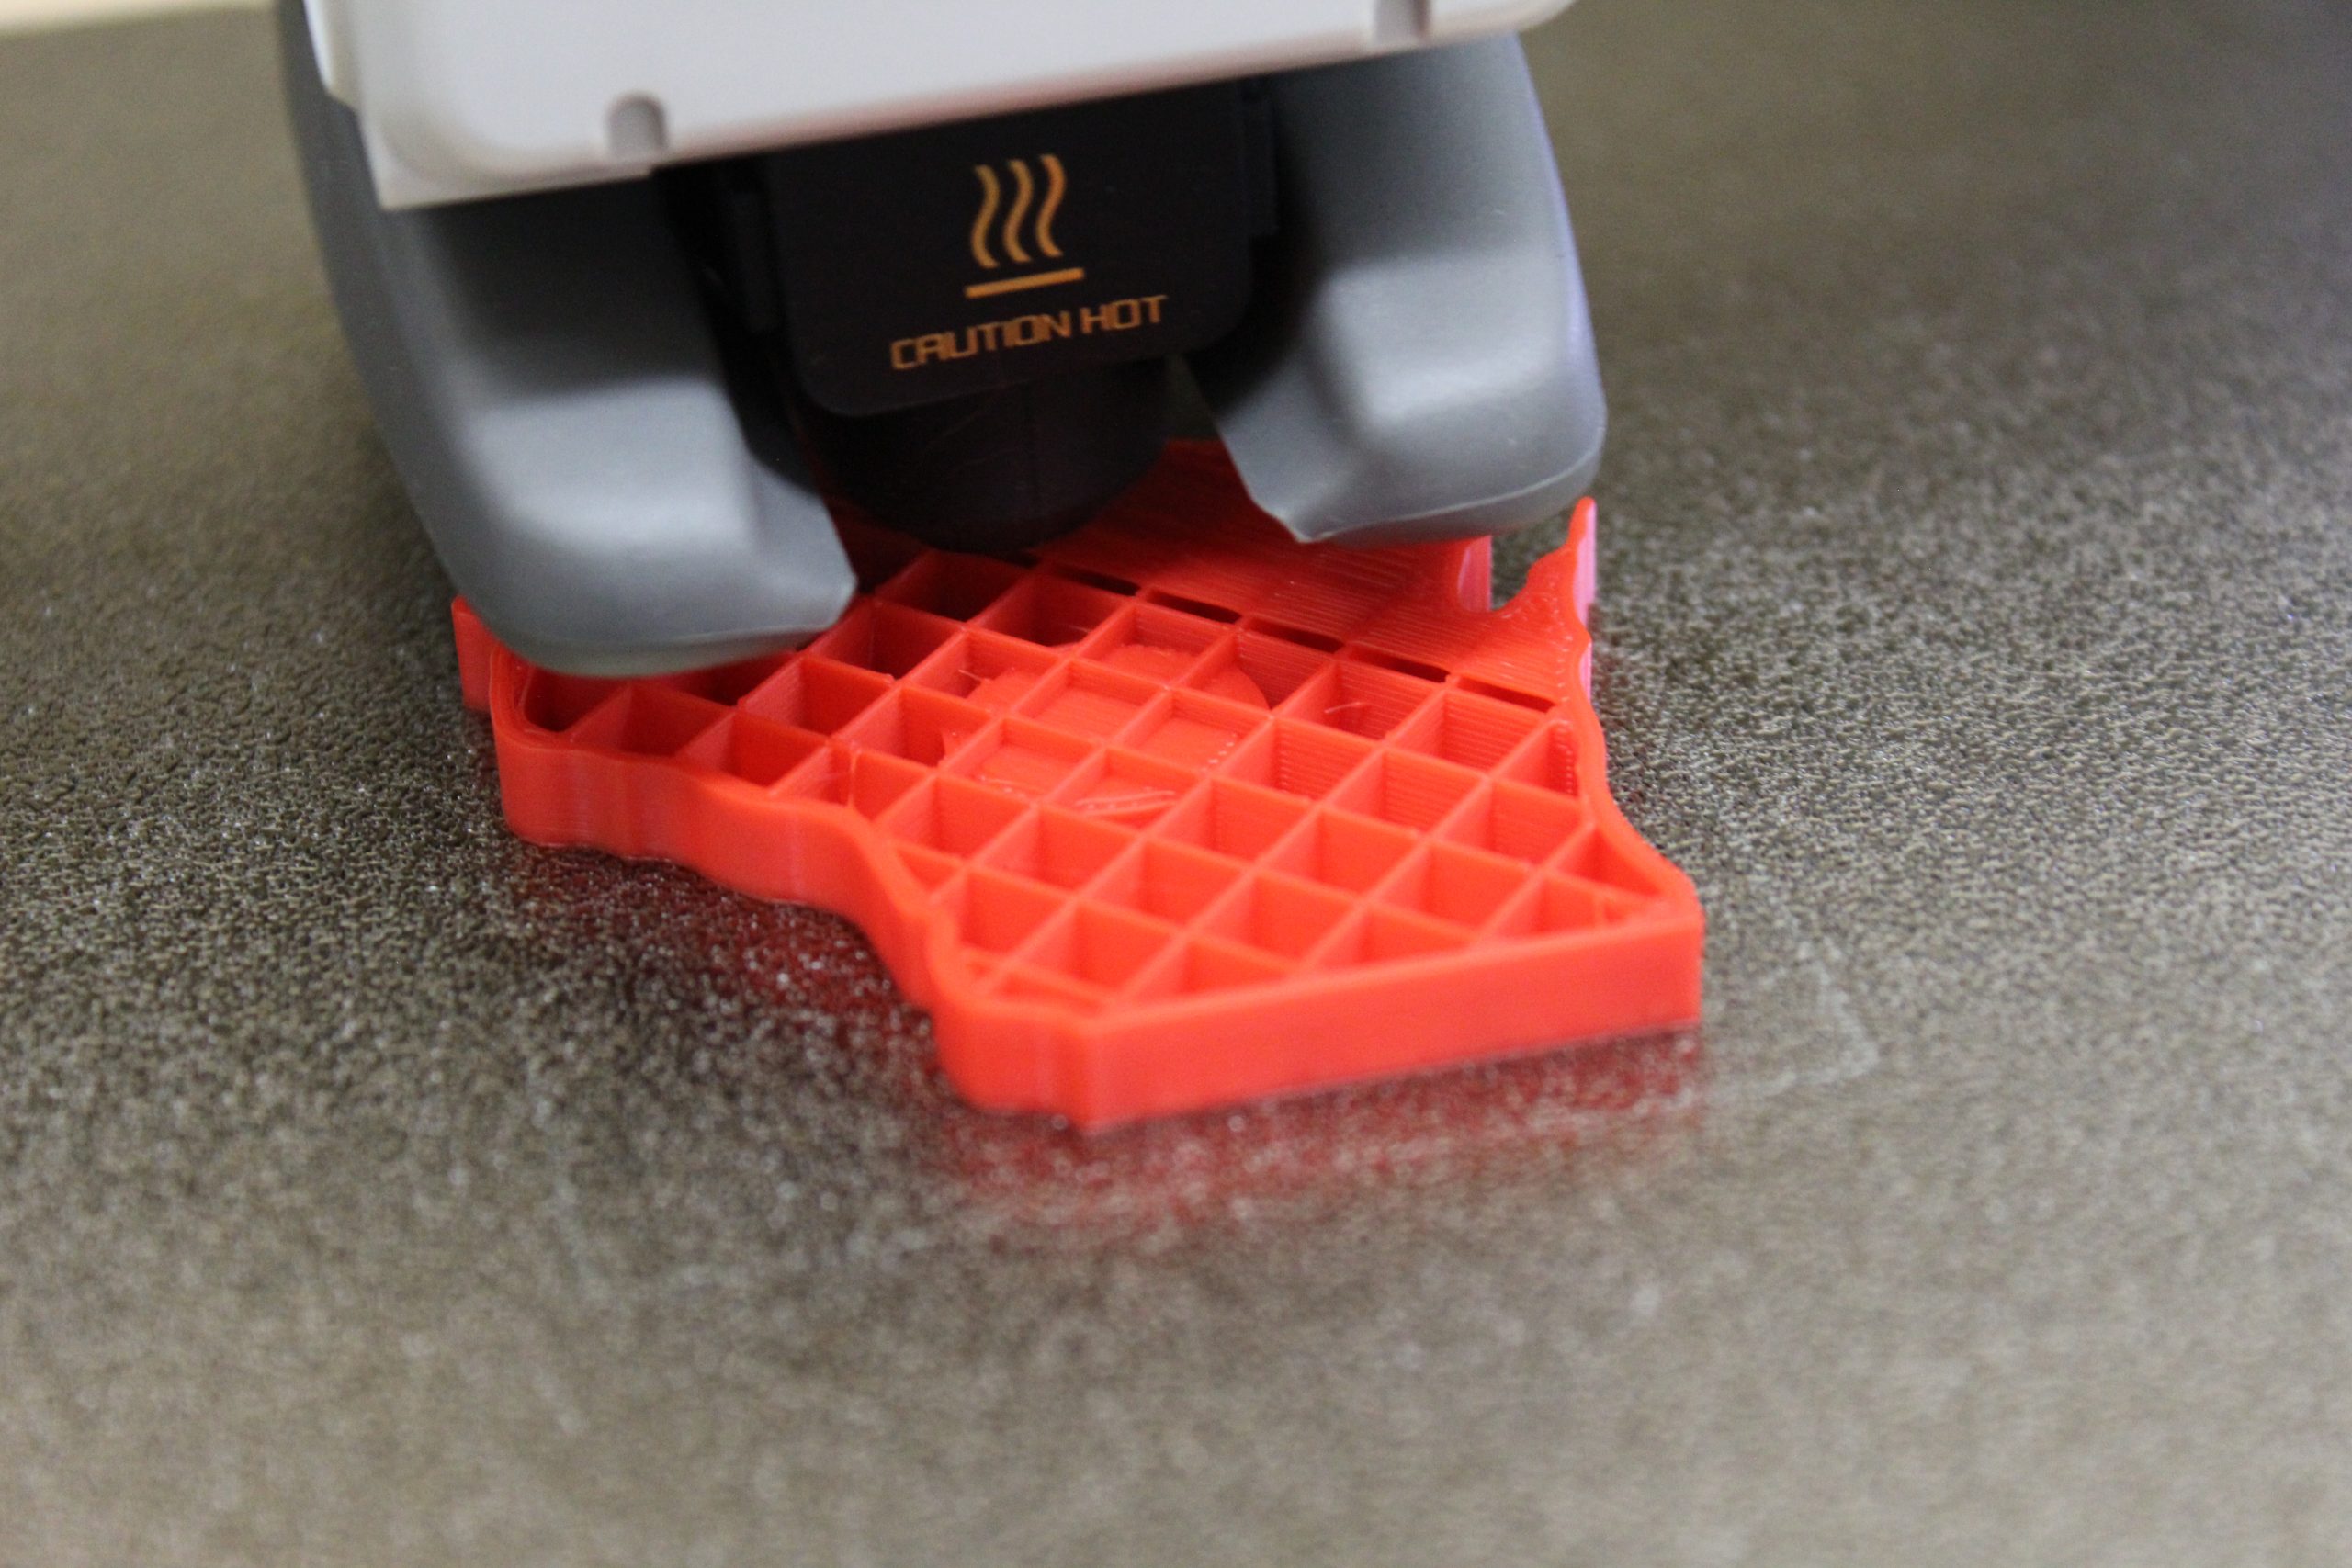
After Printing is finished, allow the build plate to cool for a couple of minutes, then remove the magnetic build plate and gently bend the plate.
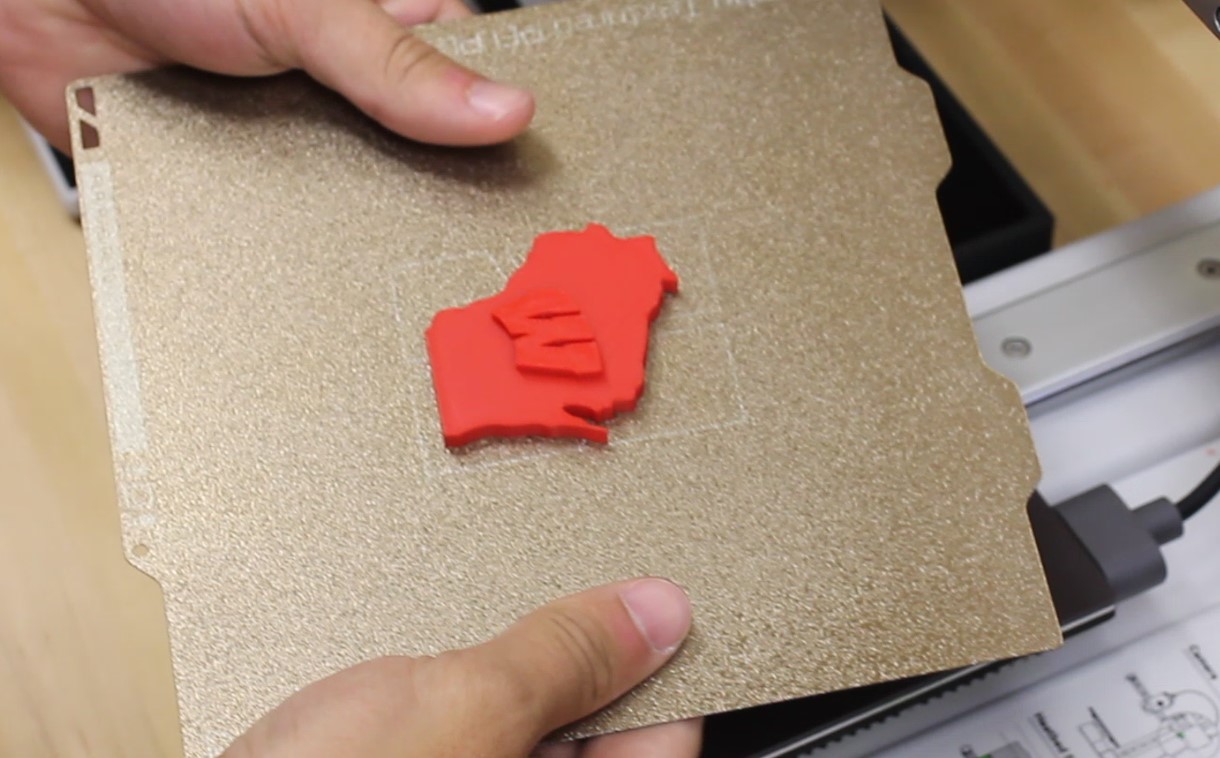
Figure 1. Removing the build plate. (Caution: Build Plate may be hot: check the indicated temperature on the top of the screen)
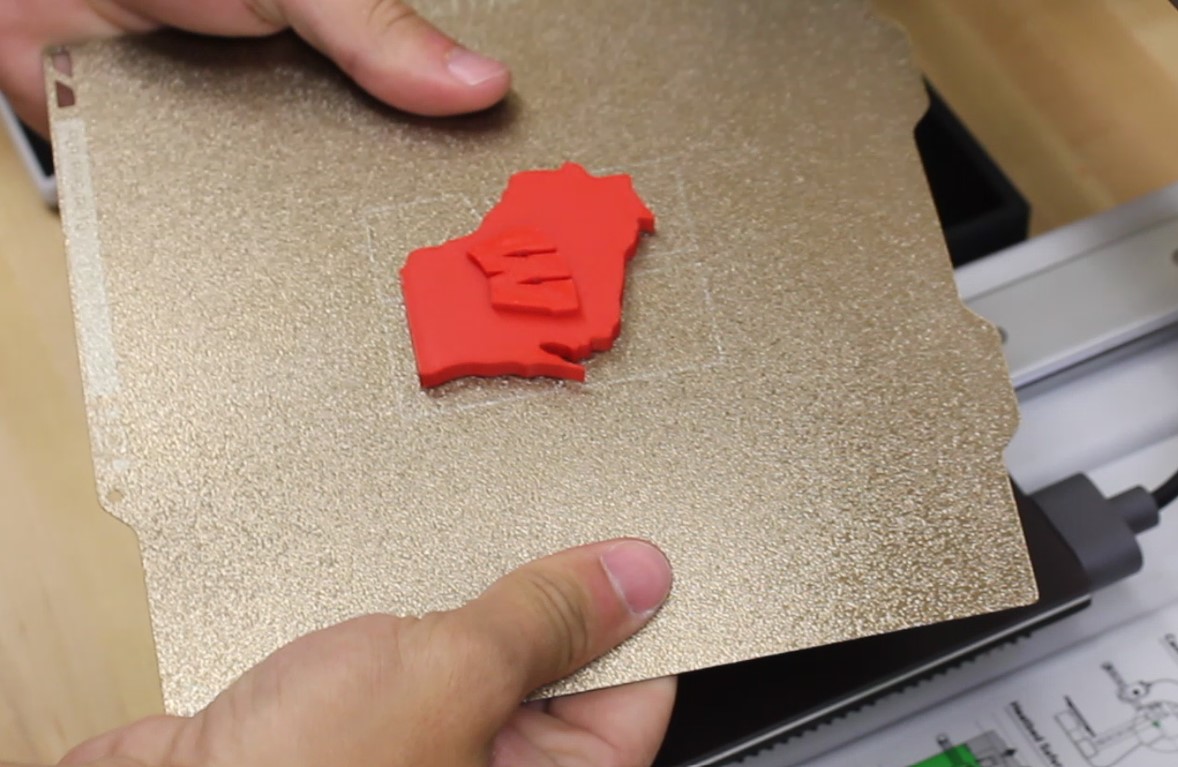
Figure 2. Slightly bending the build plate to remove the part.
The part should now be easily removed.
Make sure to properly align the build plate and ensure that the build plate is clean.
Figure 3. A bad example and a good example of replacing the build plate.
After putting the build plate back, turn the printer off by flipping the switch located on the back of the printer.
Overview
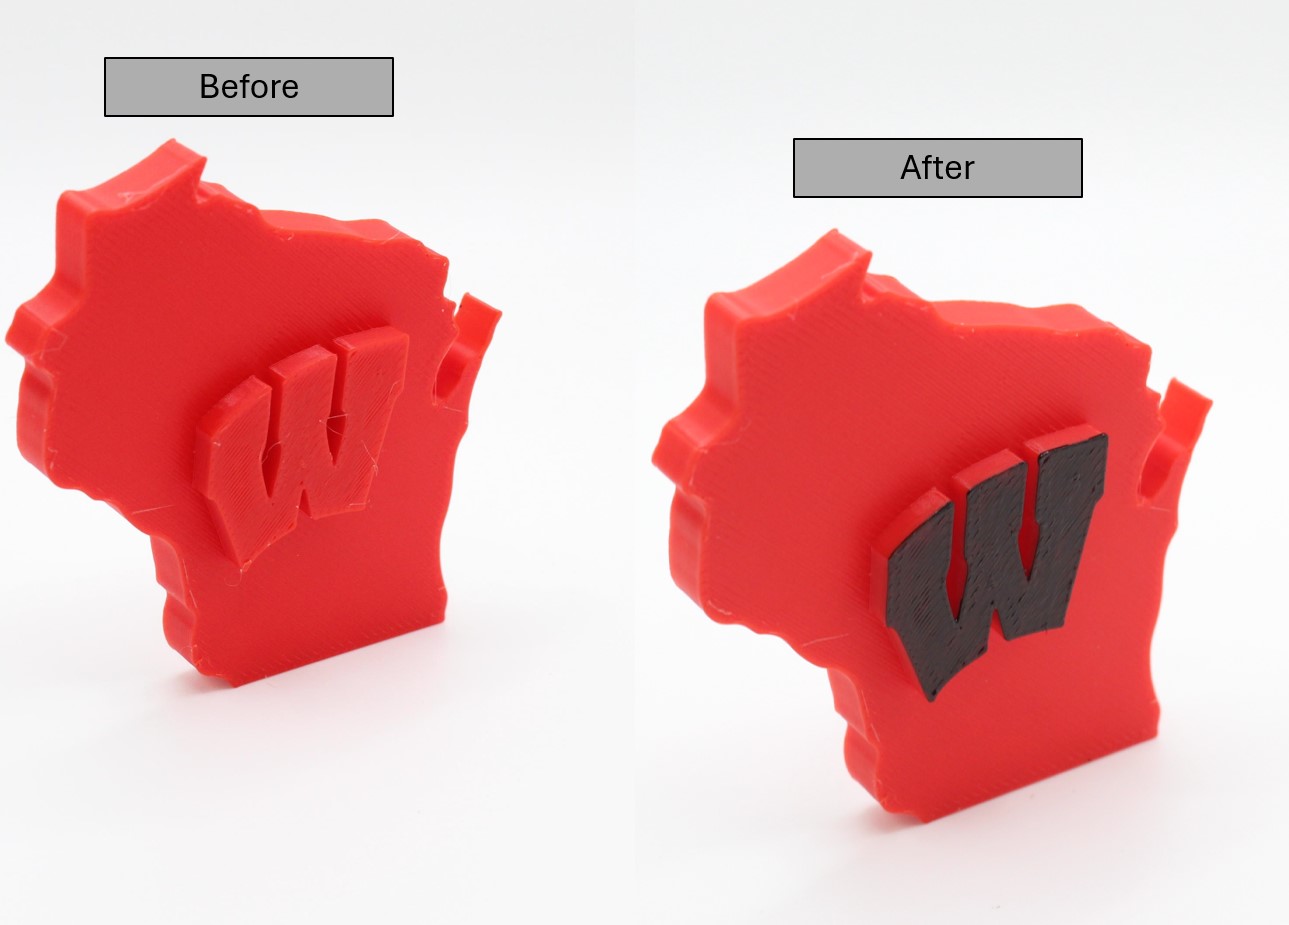
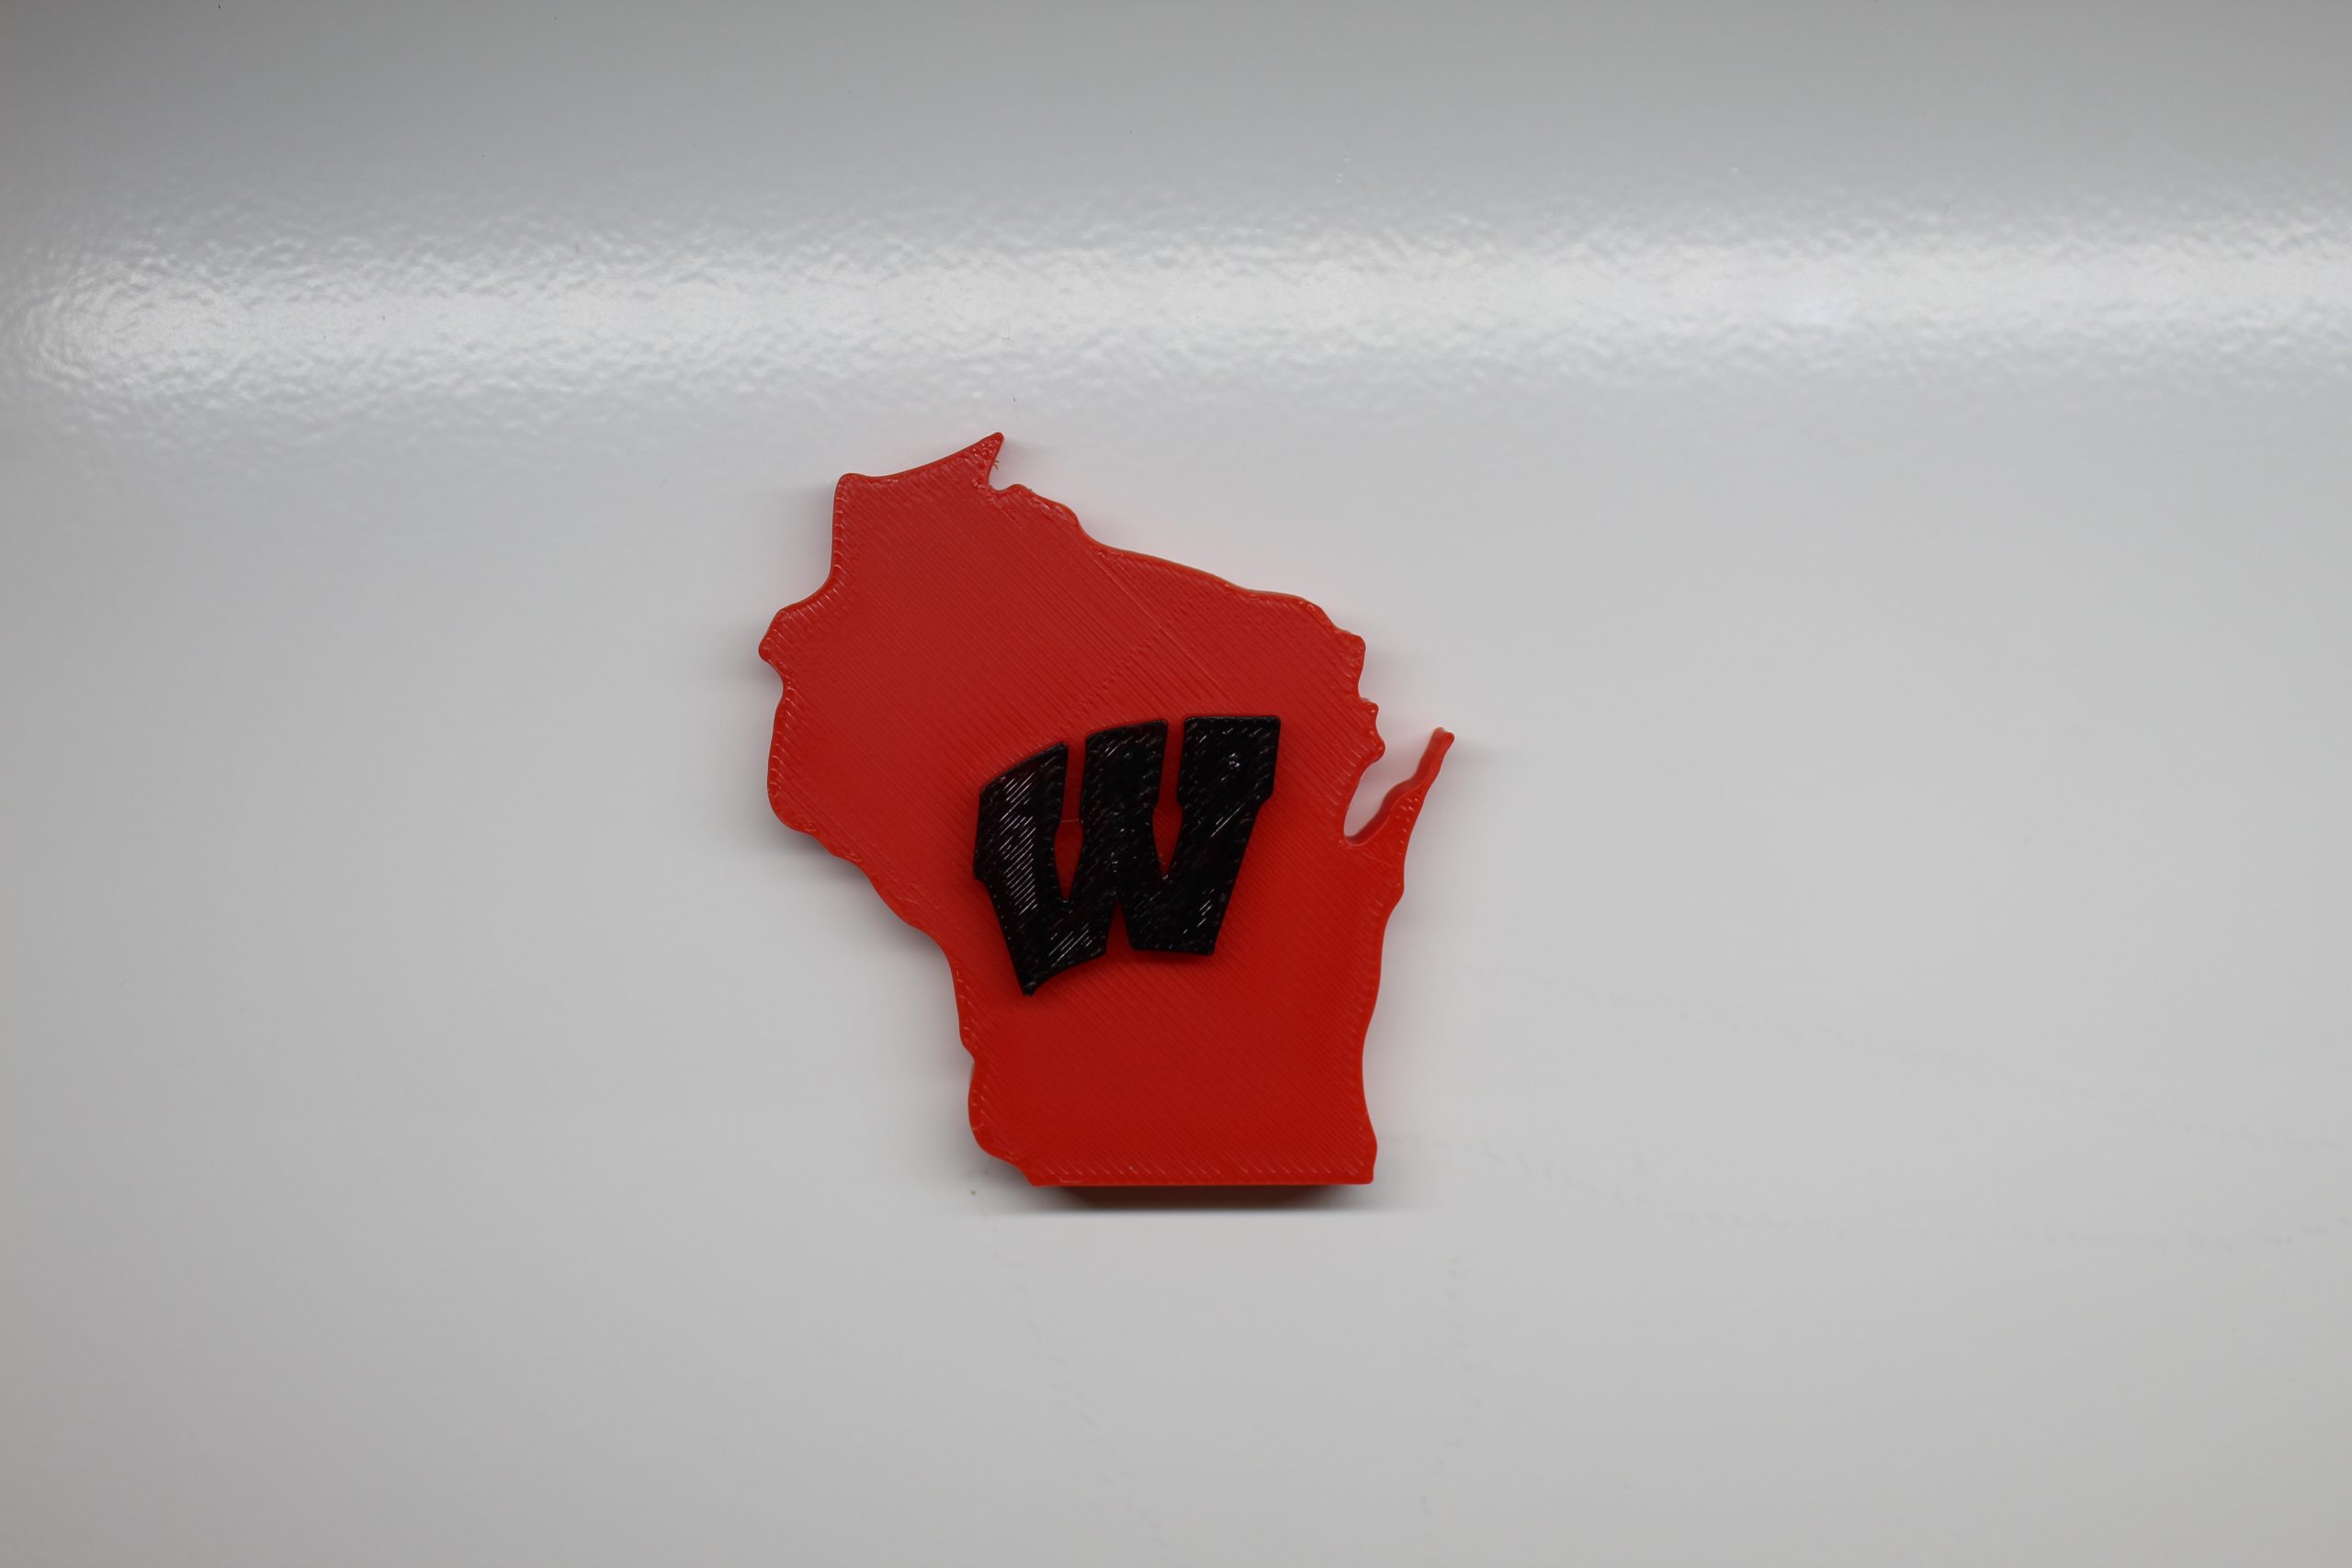
The post-processing of the part will be the final thing that needs to be done. In this portion, the supports will be removed and the magnet will be inserted. Additionally, the W in the logo will be colored in, however this step is optional.
All Materials and tools needed for post-processing are located in the “Basic Print” drawer in the 3D printing cart.
Removing the supports
Using the small diagonal cutters, simply cut into and pull of the small support block on the back of the part.
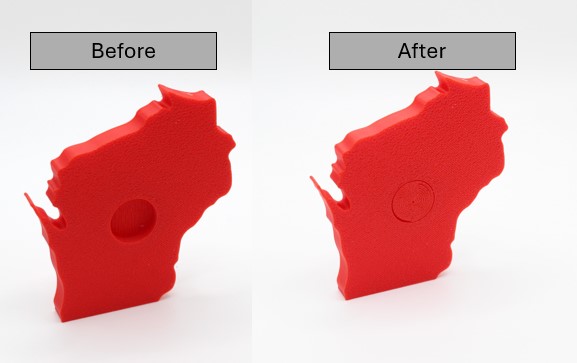
Adding Magnet

Coloring the “W”
Simply using a marker, carefully color of the embossed “W” until you are happy with the result.
This completes the Basic Part Training Module!