Overview
Supports are an important feature to be aware of in the 3D printing space. They allow you to print geometries that would otherwise be impossible using additive manufacturing. Properly using and designing supports is important for achieving high-quality prints. Bambu Studio is already very good at automatically generating supports, but it can have some shortcomings that can be fixed with manual inputs. (Note: This page will not necessarily focus on support removal, that topic is covered under the Post-Processing Module.)
Overview
There are two support types available in Bambu Studio, these being Normal and Tree supports. Each of these support types have areas where they excel, where the other type comes up short.
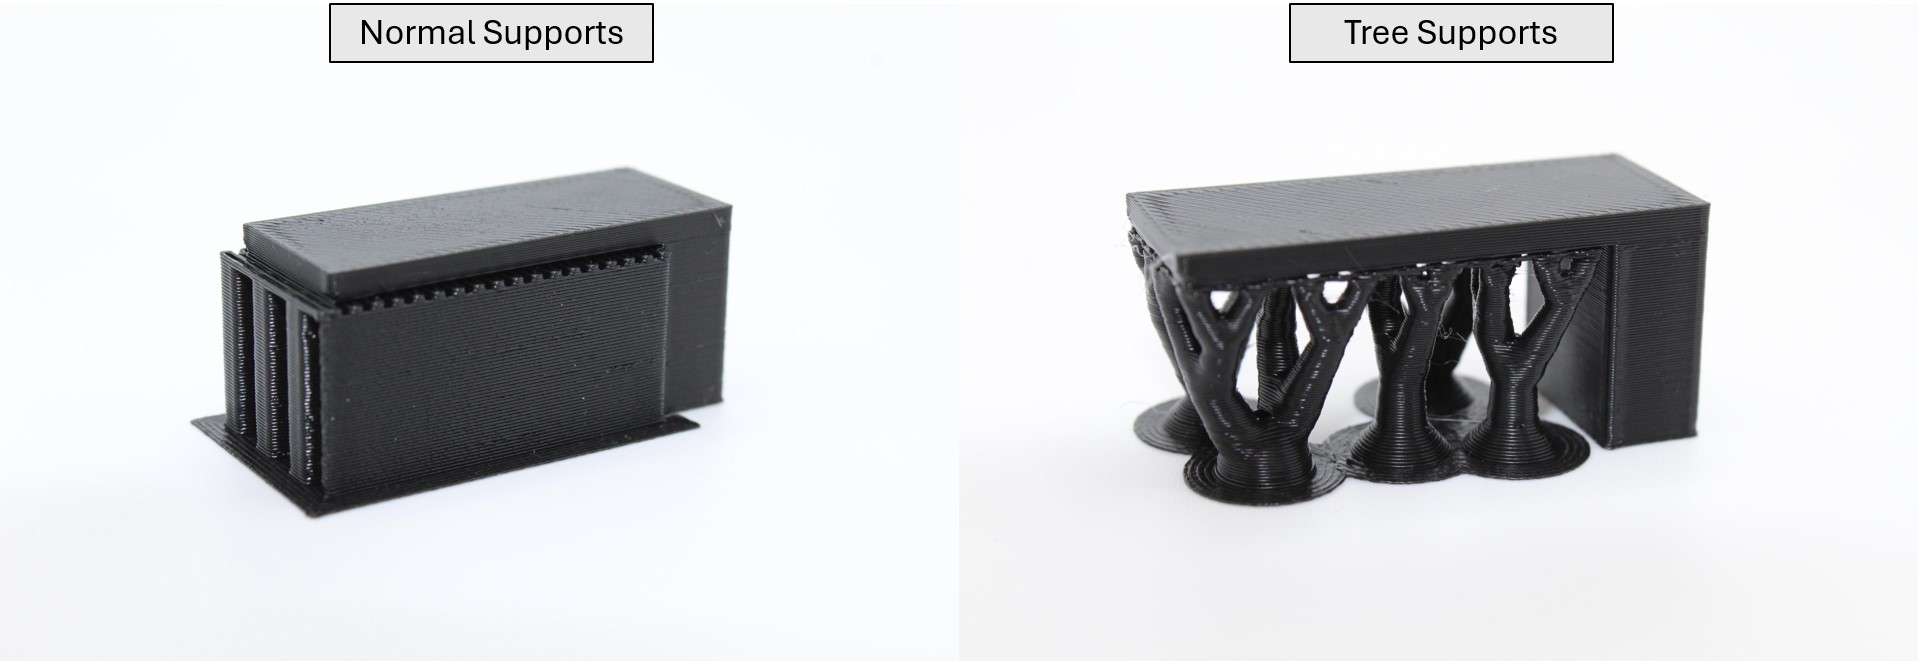
Figure 1. Normal supports versus tree supports.
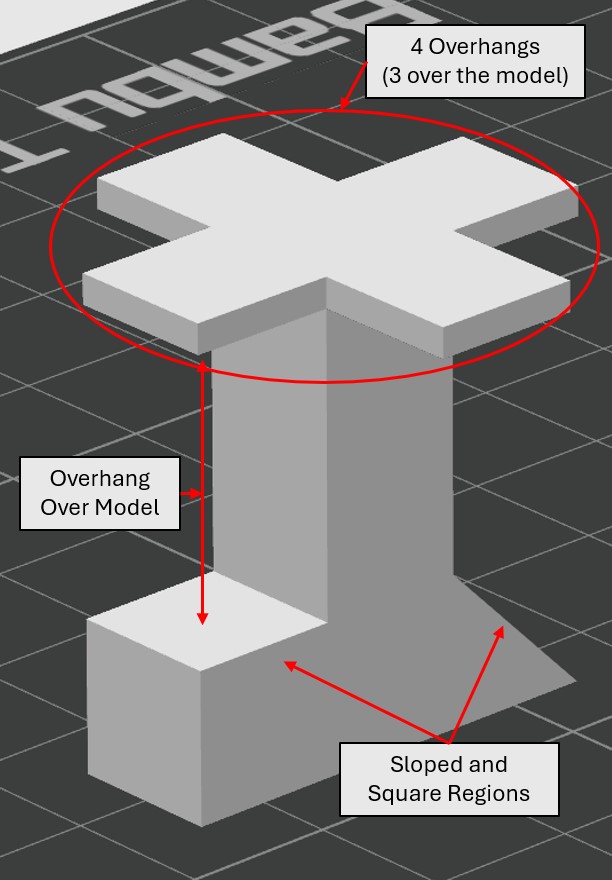
To show the differences between support types, the test model pictured below in Figure 2. will be used.
Normal Supports
Normal Supports are the “old school” support style and are somewhat outdated in 3D printing. However, they do excel in a couple of areas. The first is that they (usually) offer a slightly faster print time, as the nozzle does not have to move around as much as it does for tree supports.
In addition to this, normal supports have a slightly better surface finish on the part that is supported (see Figure 3 below).
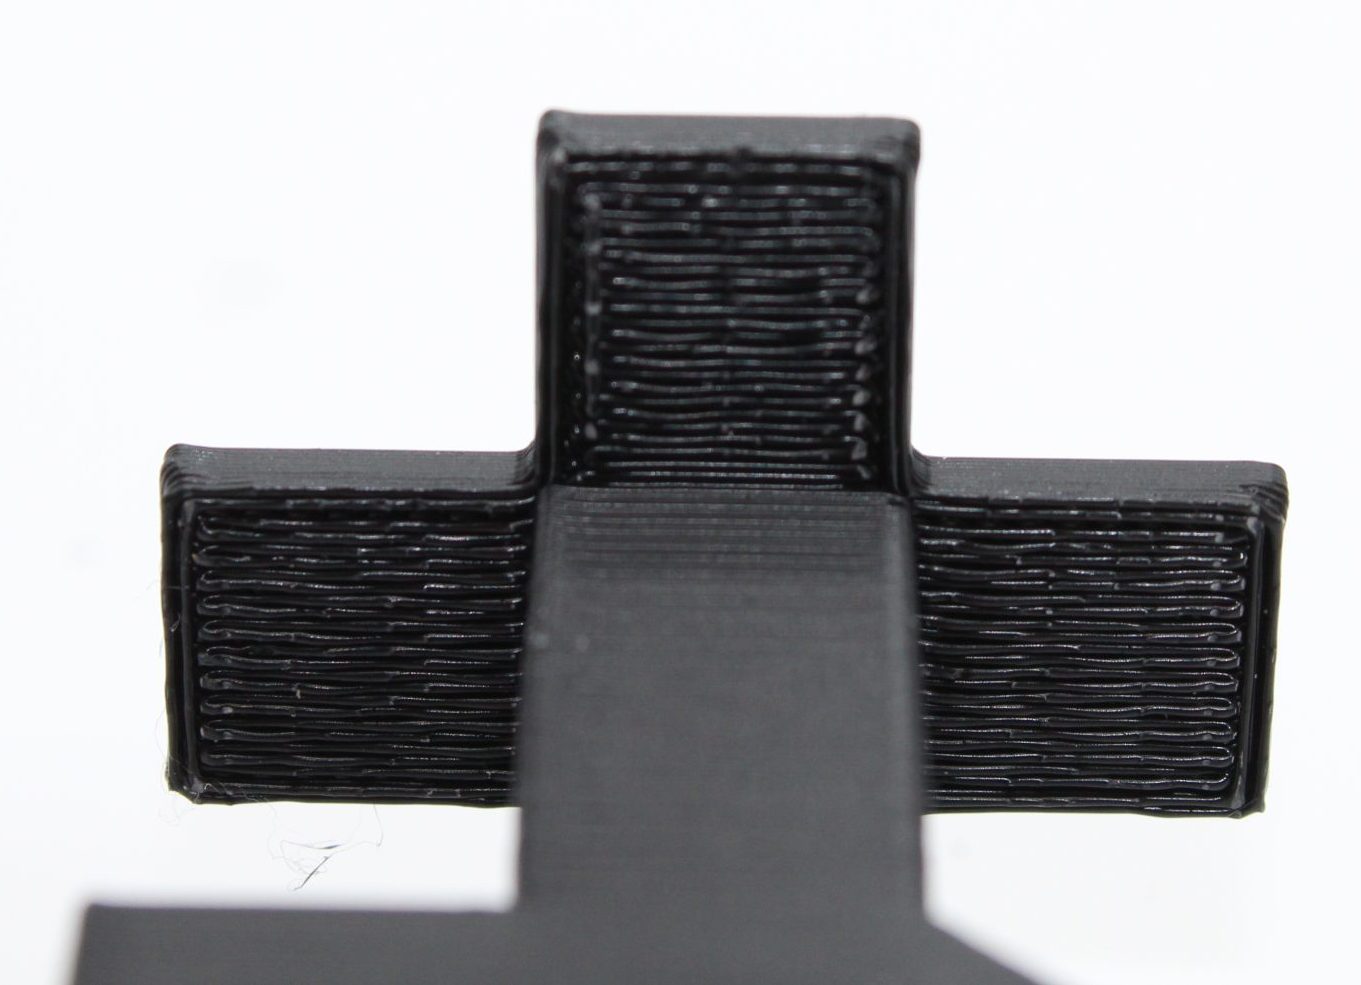
Figure 3. Surface finish of the normal supports on the supported overhangs.
Cons
One of the drawbacks to normal supports is that they use significantly more material than tree supports. In the picture below, you can see that this particular model has the exact same printing time for each support type, but the tree supports are using half the support material.

Figure 4. Print time and material usage for each support types.
Another draw back is that the supports can only be used vertically. This can be a drawback in the case where there is an overhang over the model. In this situation, the supports would have to go from the model to support the overhang. This leads to a rough surface finish where the supports were used, as well as difficult to remove supports. Difficult to remove supports not only increase the time it takes to remove the supports, but also increases the odds of breaking the model.
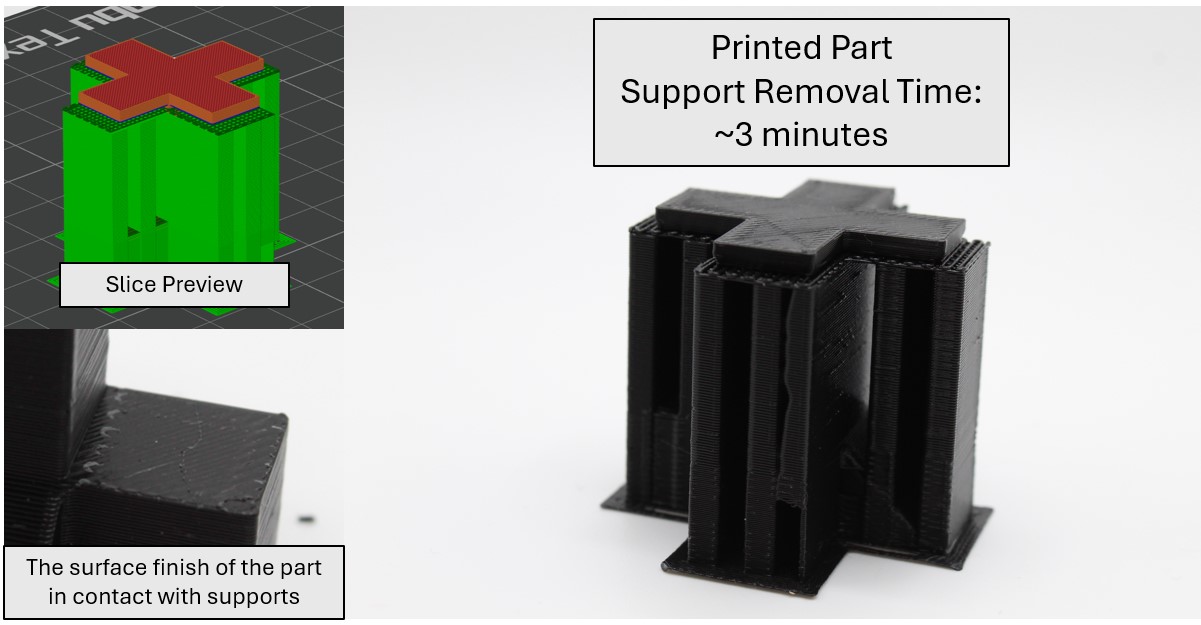
Figure 5. Surface finish of normal supports on the unsupported part of the model and the support removal time for the supports.
If you choose to select the setting titled “On build plate only”, the supports will be generated only over the build plate. This can lead to the problem where the printer will print the overhangs with no support (pictured in Figure 6), leading to a practically unusable part.
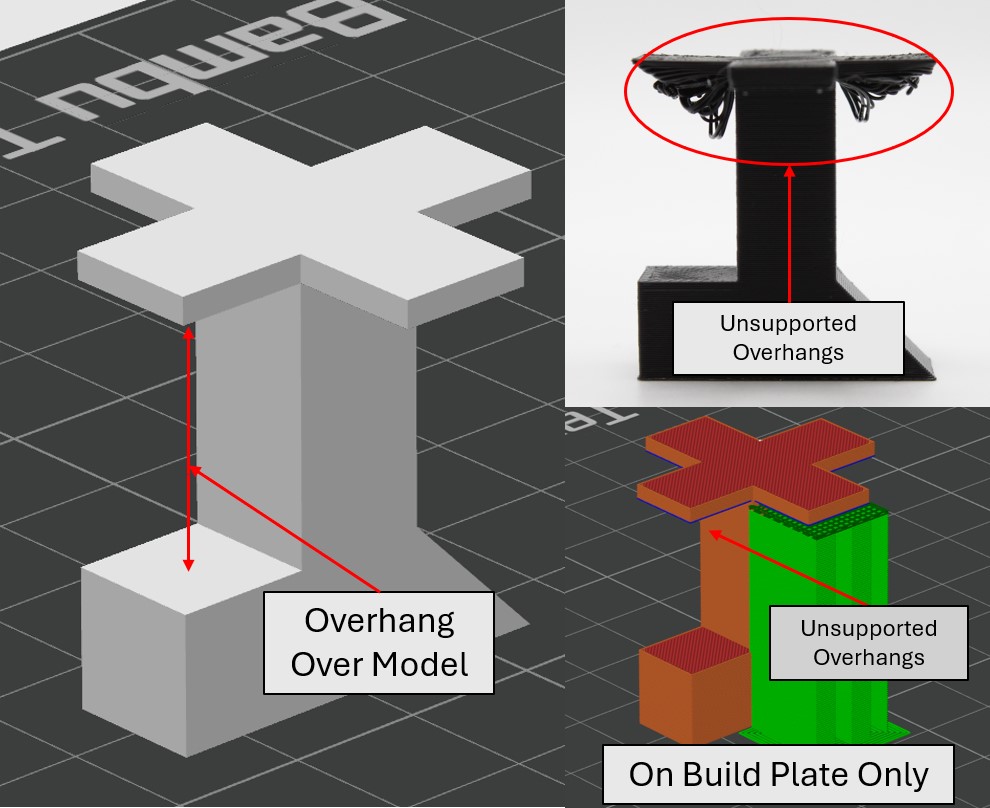
Figure 6. Normal over hangs with “On build plate only” setting, leading to unsupported overhangs.
Tree Supports
Tree supports excel in a lot of areas that normal supports lack in. The first is that they can bend around a model to avoid touching any part of the model that does not need support. This leads to better surface finishes on the unsupported faces of a model (See Figure 7). Additionally, tree supports use significantly less material than normal supports (see Figure 4 as a reference).
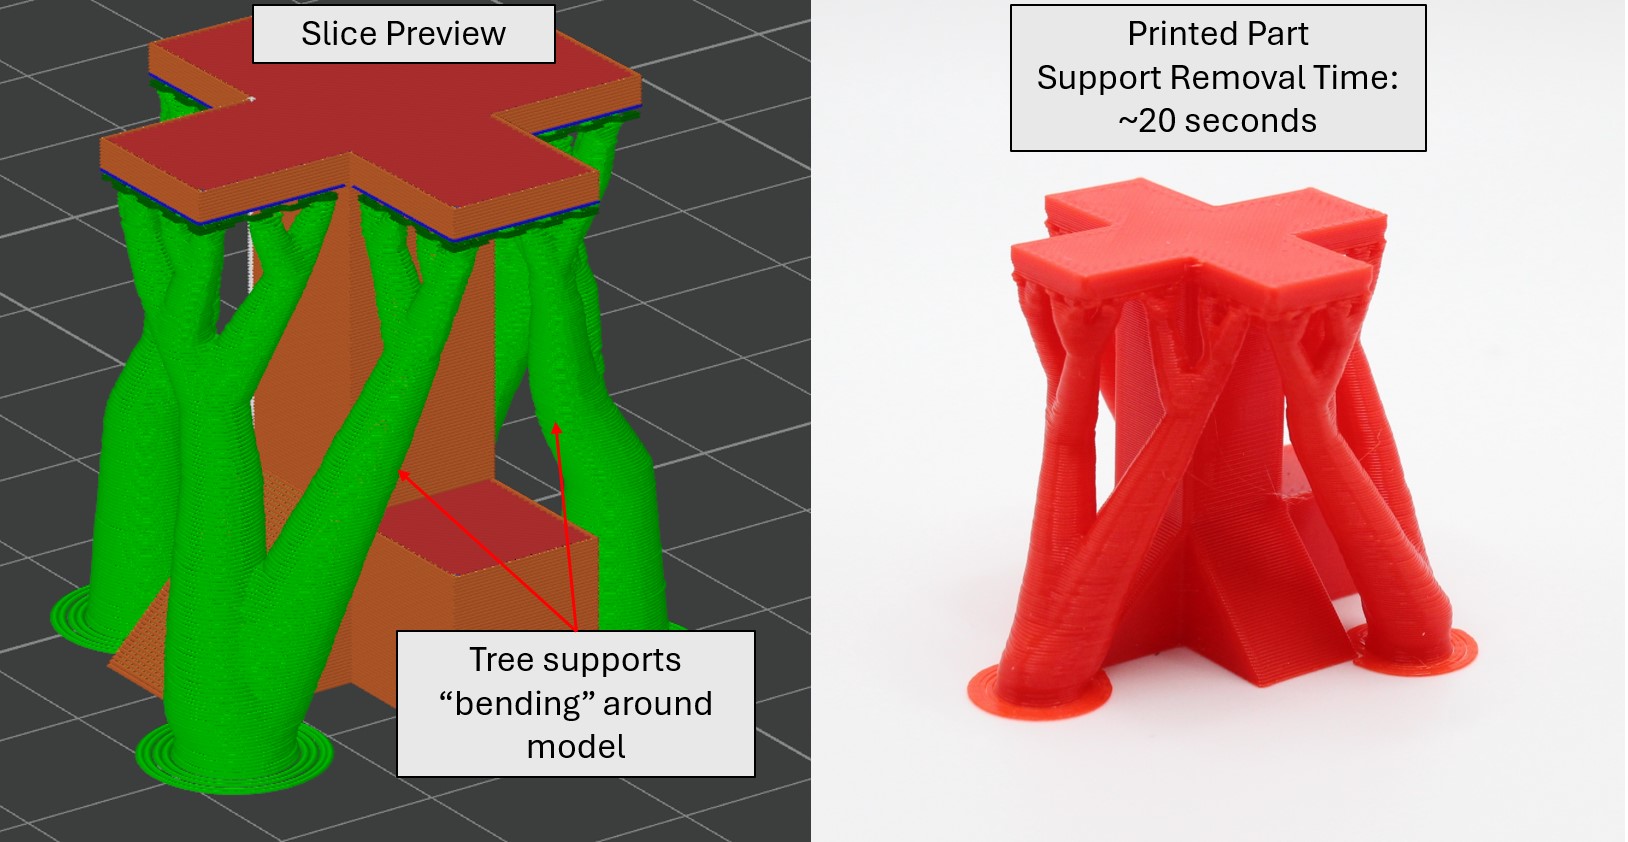
Figure 7. Tree supports on the test model. Notice how the supports bend around the model and use significantly less material than the normal supports, leading to quick removal times.
Cons
Tree supports are not perfect, and fall short in some areas. The first being the printing time of a model. Some certain models will have much longer printing times with tree supports due to the nozzle having to move around a lot more. In addition to this, tree supports sometimes have reliability issues with properly supporting the model, leading to print failures. Lastly, tree supports have a slightly worse surface finish on the supported face of the part (see Figure 8).

Figure 8. Difference in surface finish between tree supports and normal supports.
Support Decision Matrix
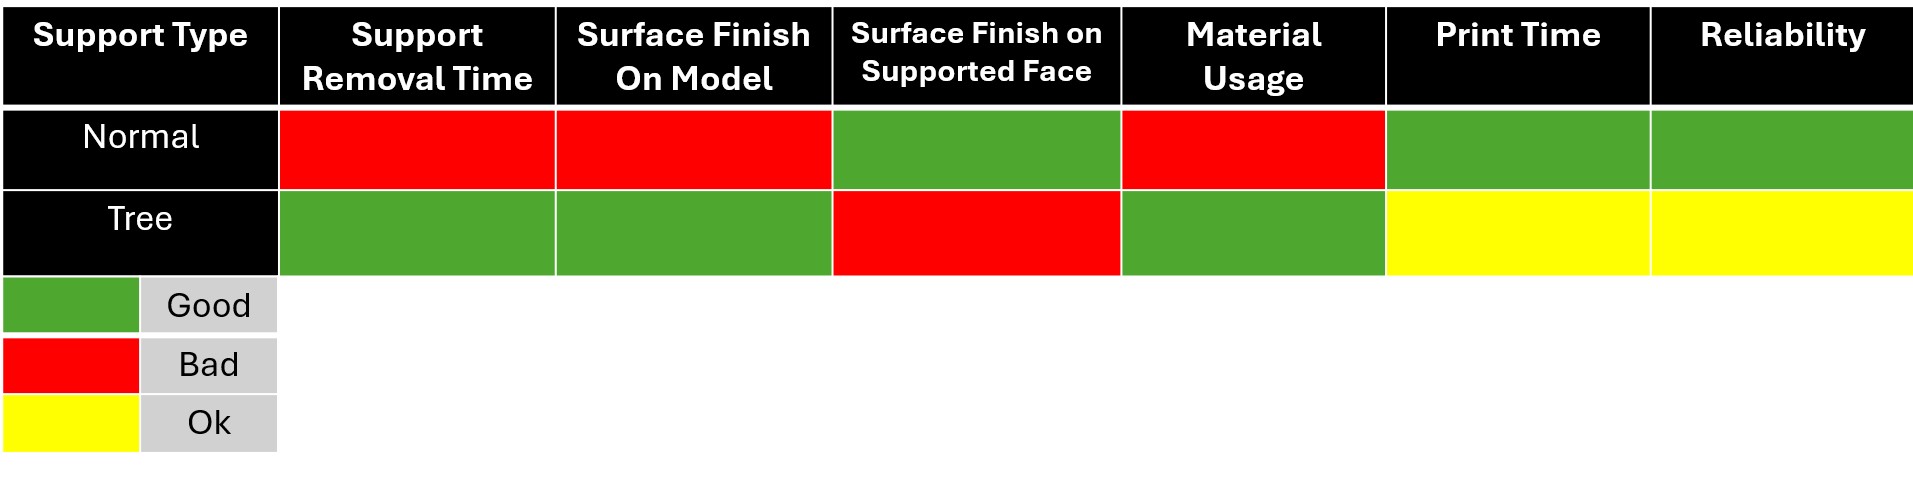
In conclusion, both supports have their uses where it makes sense to use one of the other. However, for most cases, it is better to use tree supports, simply due to the material usage, as well as the removal time. If the surface finish of the supported face (overhang) is important then normal supports should be used. Otherwise, in almost all other cases, tree supports should be used. Figure 9 is a decision matrix to help you decide which support you should use.
Overview
Painting Supports can be a helpful tool to have, especially when you only want supports in only some areas. An example of where support painting can be helpful is a part with an internal pocket, as well as having overhangs. Bambu Studio with the automatic settings will fill the internal pocket, making this support removal impossible without destroying the part. See the example below to see good use cases for support painting.
Example
We need a 3D printed housing for a solenoid value (pictured in Figure 1) that will both protect the valve and allow for the valve to be mounted onto a fixture plate. After taking some measurements the part was drawn up in Solid works (see Figure 2).

Figure 1. Solenoid valve that requires housing
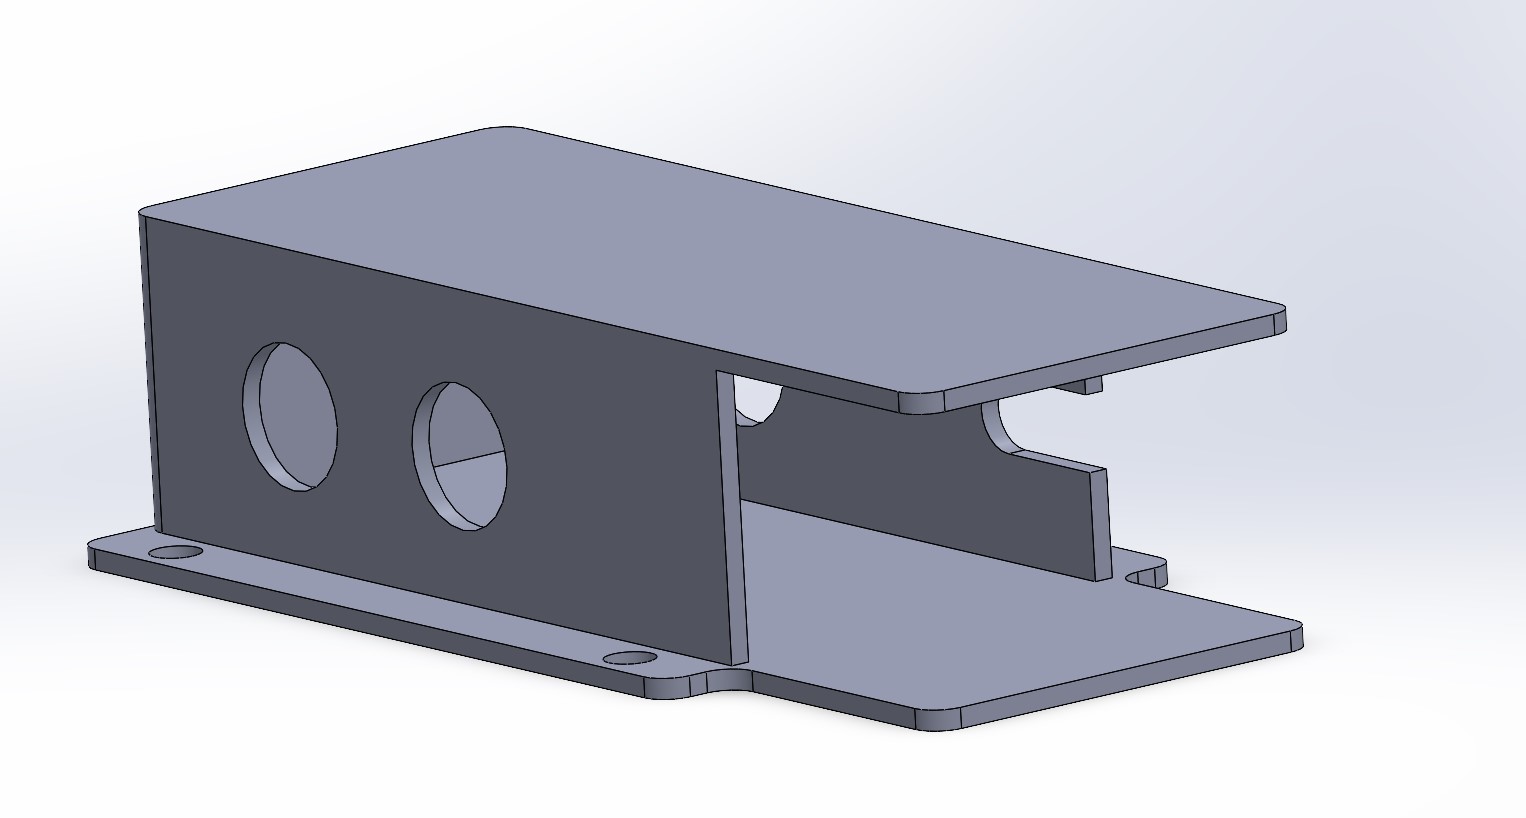
Figure 2. SolidWorks part of the solenoid housing.
Support Issue
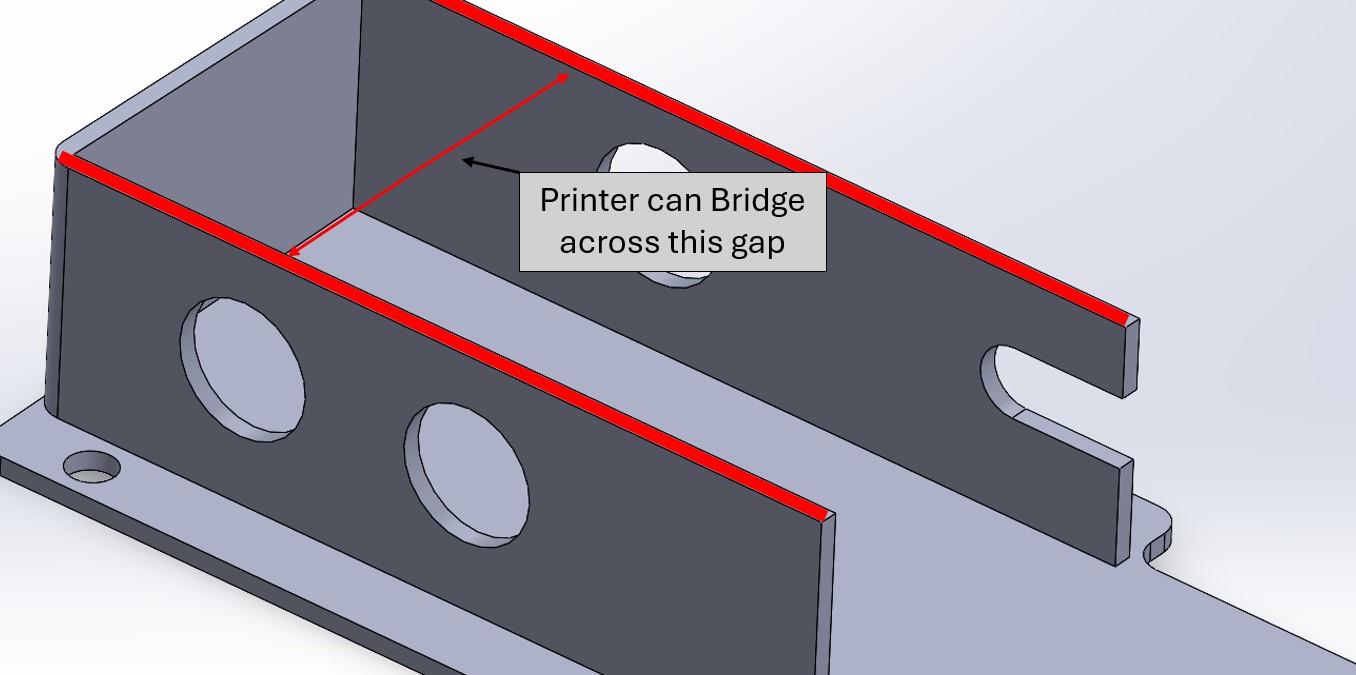
Once we go to print this part, we will find that there is a slight issue with supporting the overhangs. With auto supports, the interior of the part will be entirely filled in with supports with both tree supports and normal supports. There is also really no remedy to this problem by changing the orientation of the part. Even with tree supports turned to be on the build plate only, there is still wasted supports. In addition to wasted material, the interior supports will be incredibly annoying to remove. For this part, supports only need to be at the end of the top overhang. For the part will surrounding walls we can use the bridging technique (see Figure 4). (Check out the bridging technique tab for more information on bridging.)
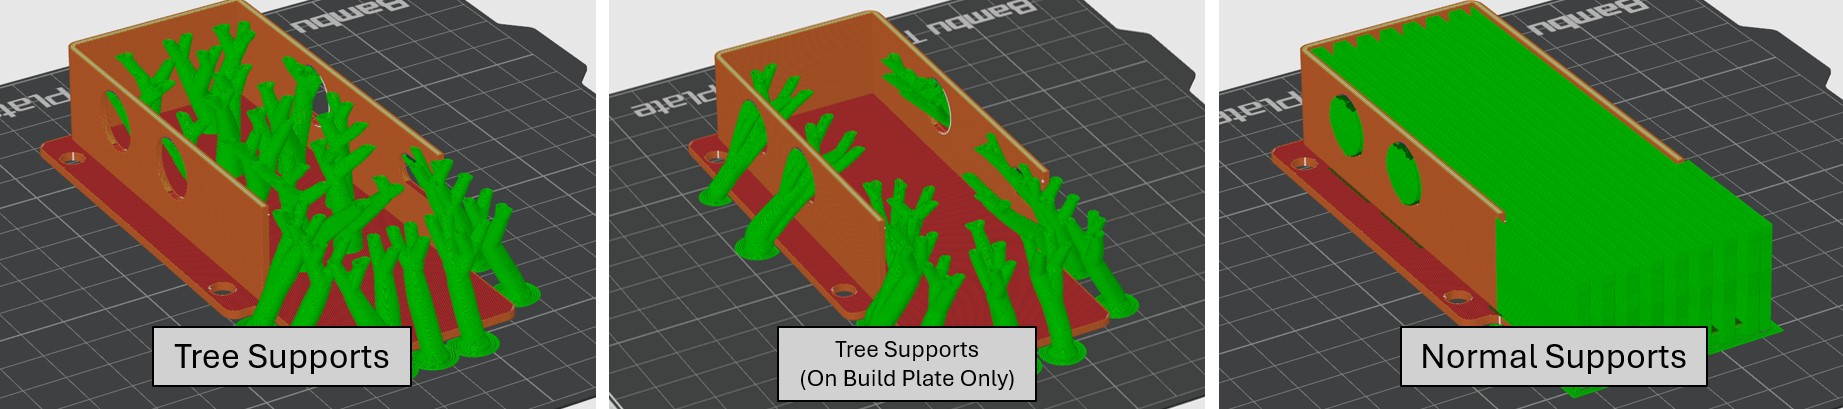
Figure 3. Auto-generated supports. Notice the amount of wasted material.
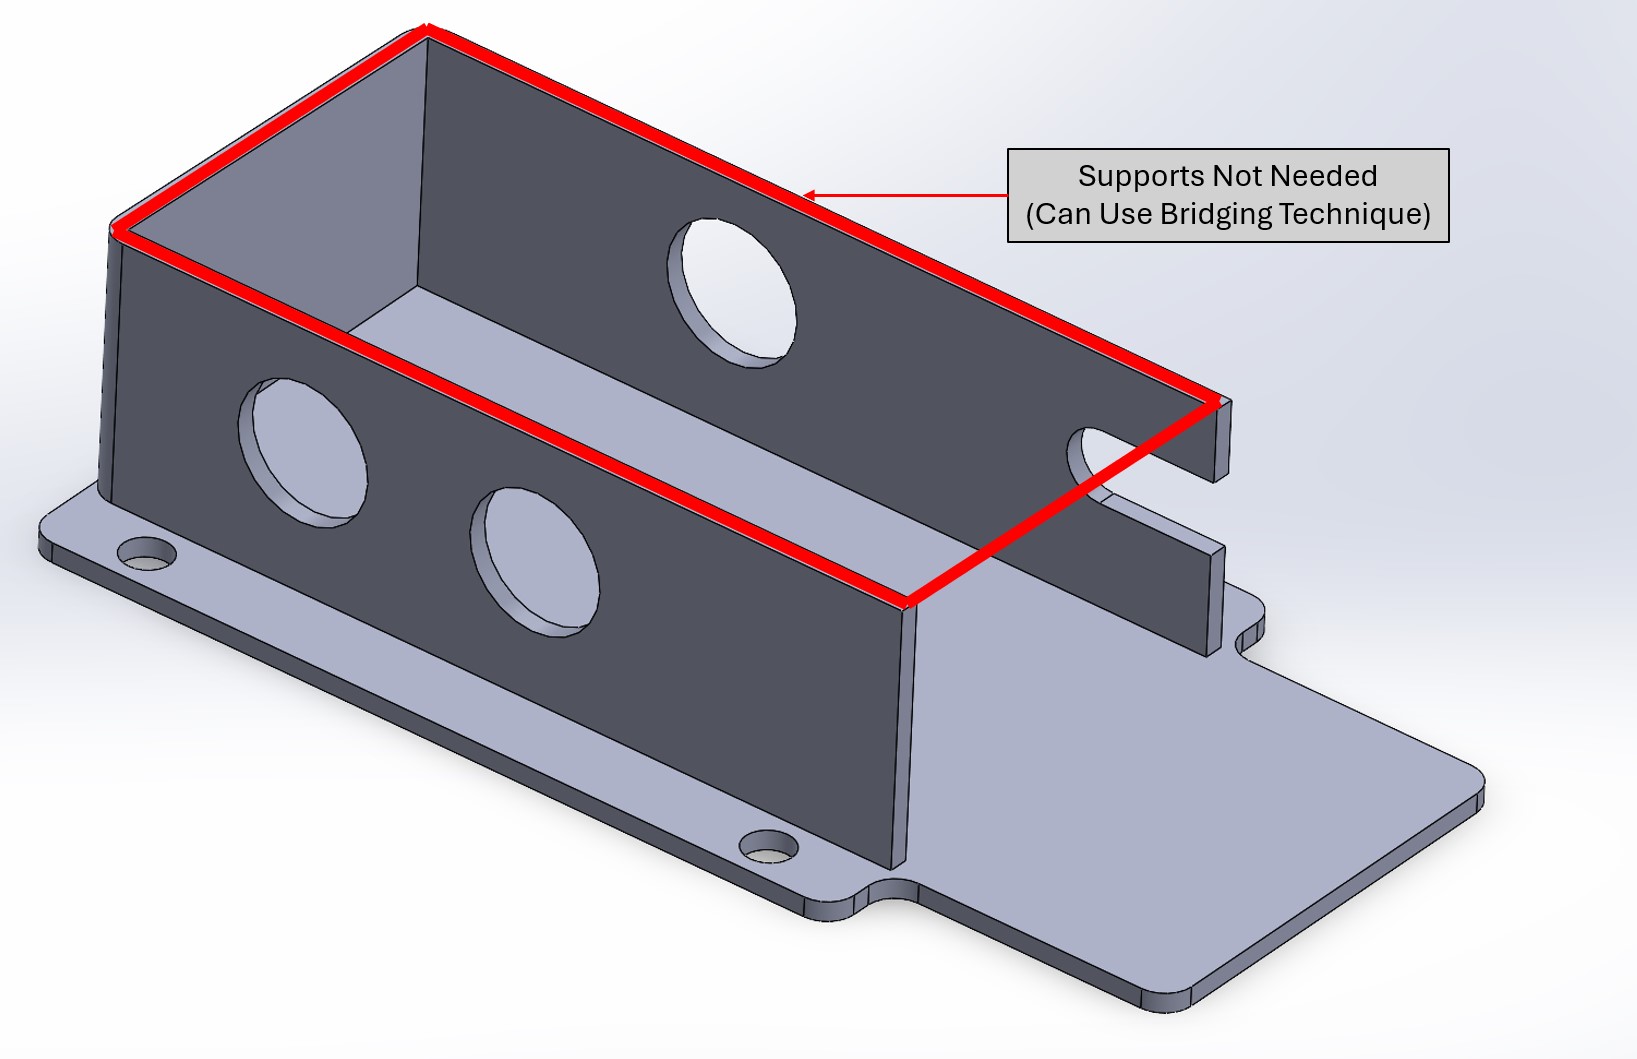
Figure 4. Area that does not require supports
Using Painted Supports
Support Painting is a tool within Bambu Studio that allows the user to manually put supports where they are necessary. Bambu Studio will highlight the overhangs with a light pink color and then with the support painting tool the user can paint the supports where they are necessary (see Figure 5).
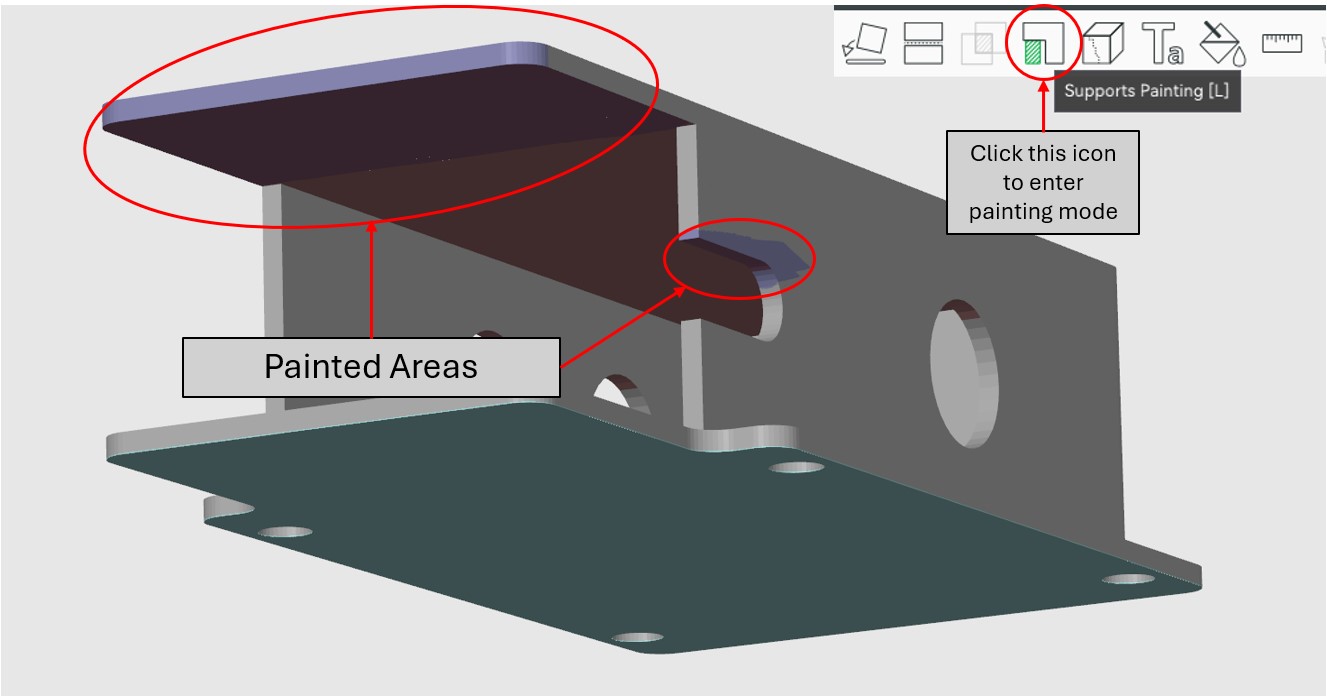
Figure 5. Painted areas for supports on the part.
Slicer Settings
Once you have painted in your supports, go to the support tab and click on the drop down on support types. Select either Normal (manual) or tree manual. For the sake of removal, tree supports were used in this example (see Figure 6).
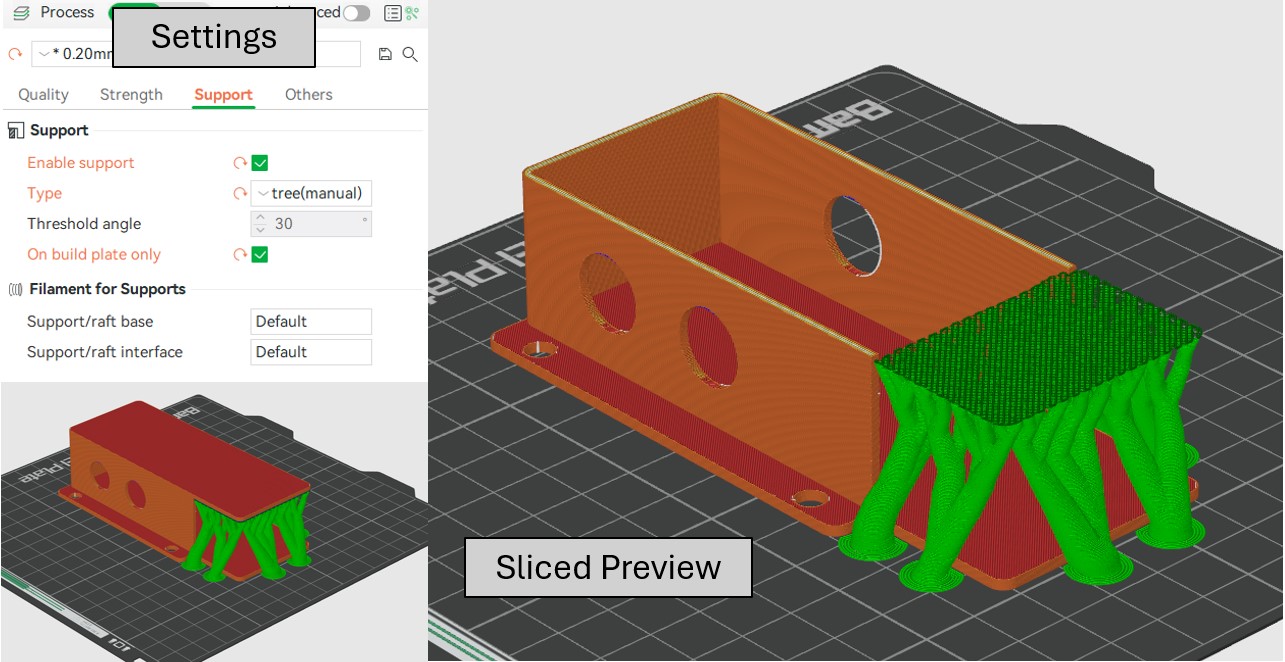
Figure 6. Painted supports in the location where they are only necessary.
Outcome
After the part has finished printing, it turned out exactly how it needed to. The solenoid valve fits perfectly into the housing, and there was very little wasted material. See the images below.
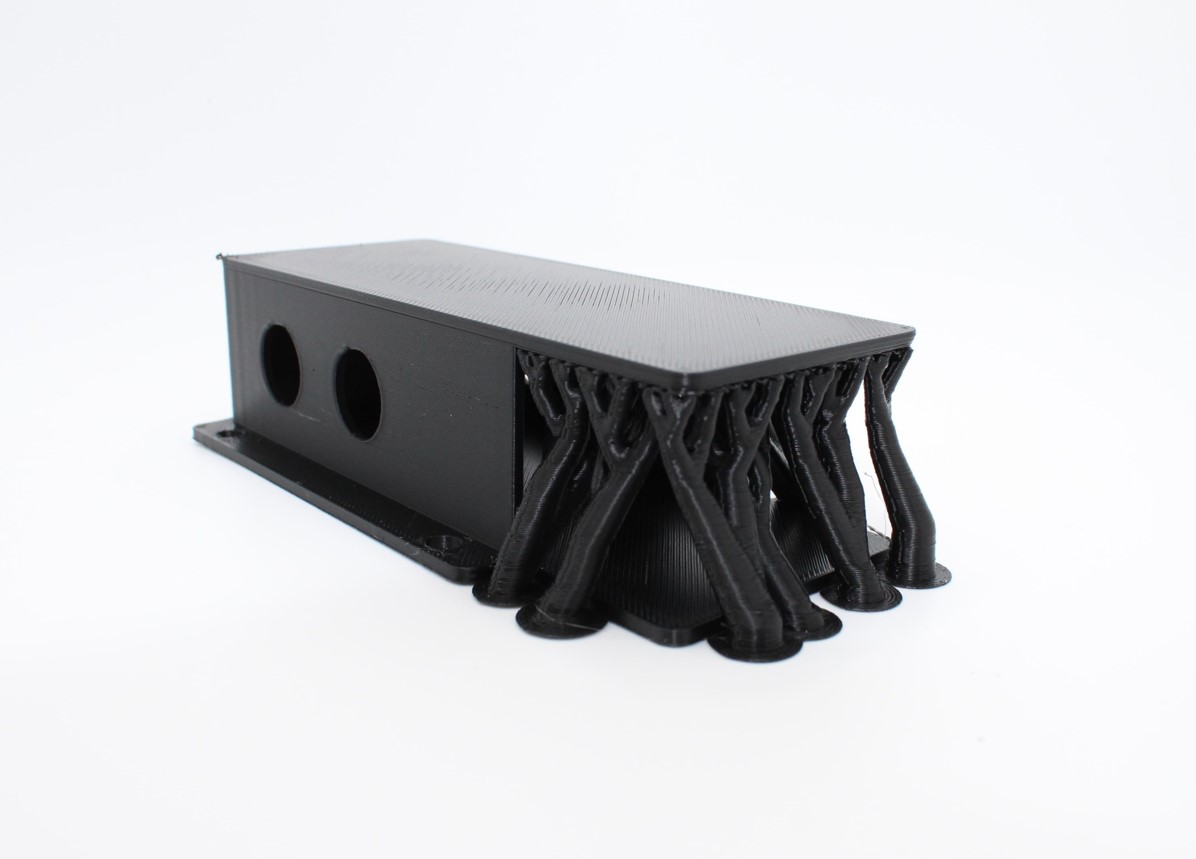
Figure 7. Printed Part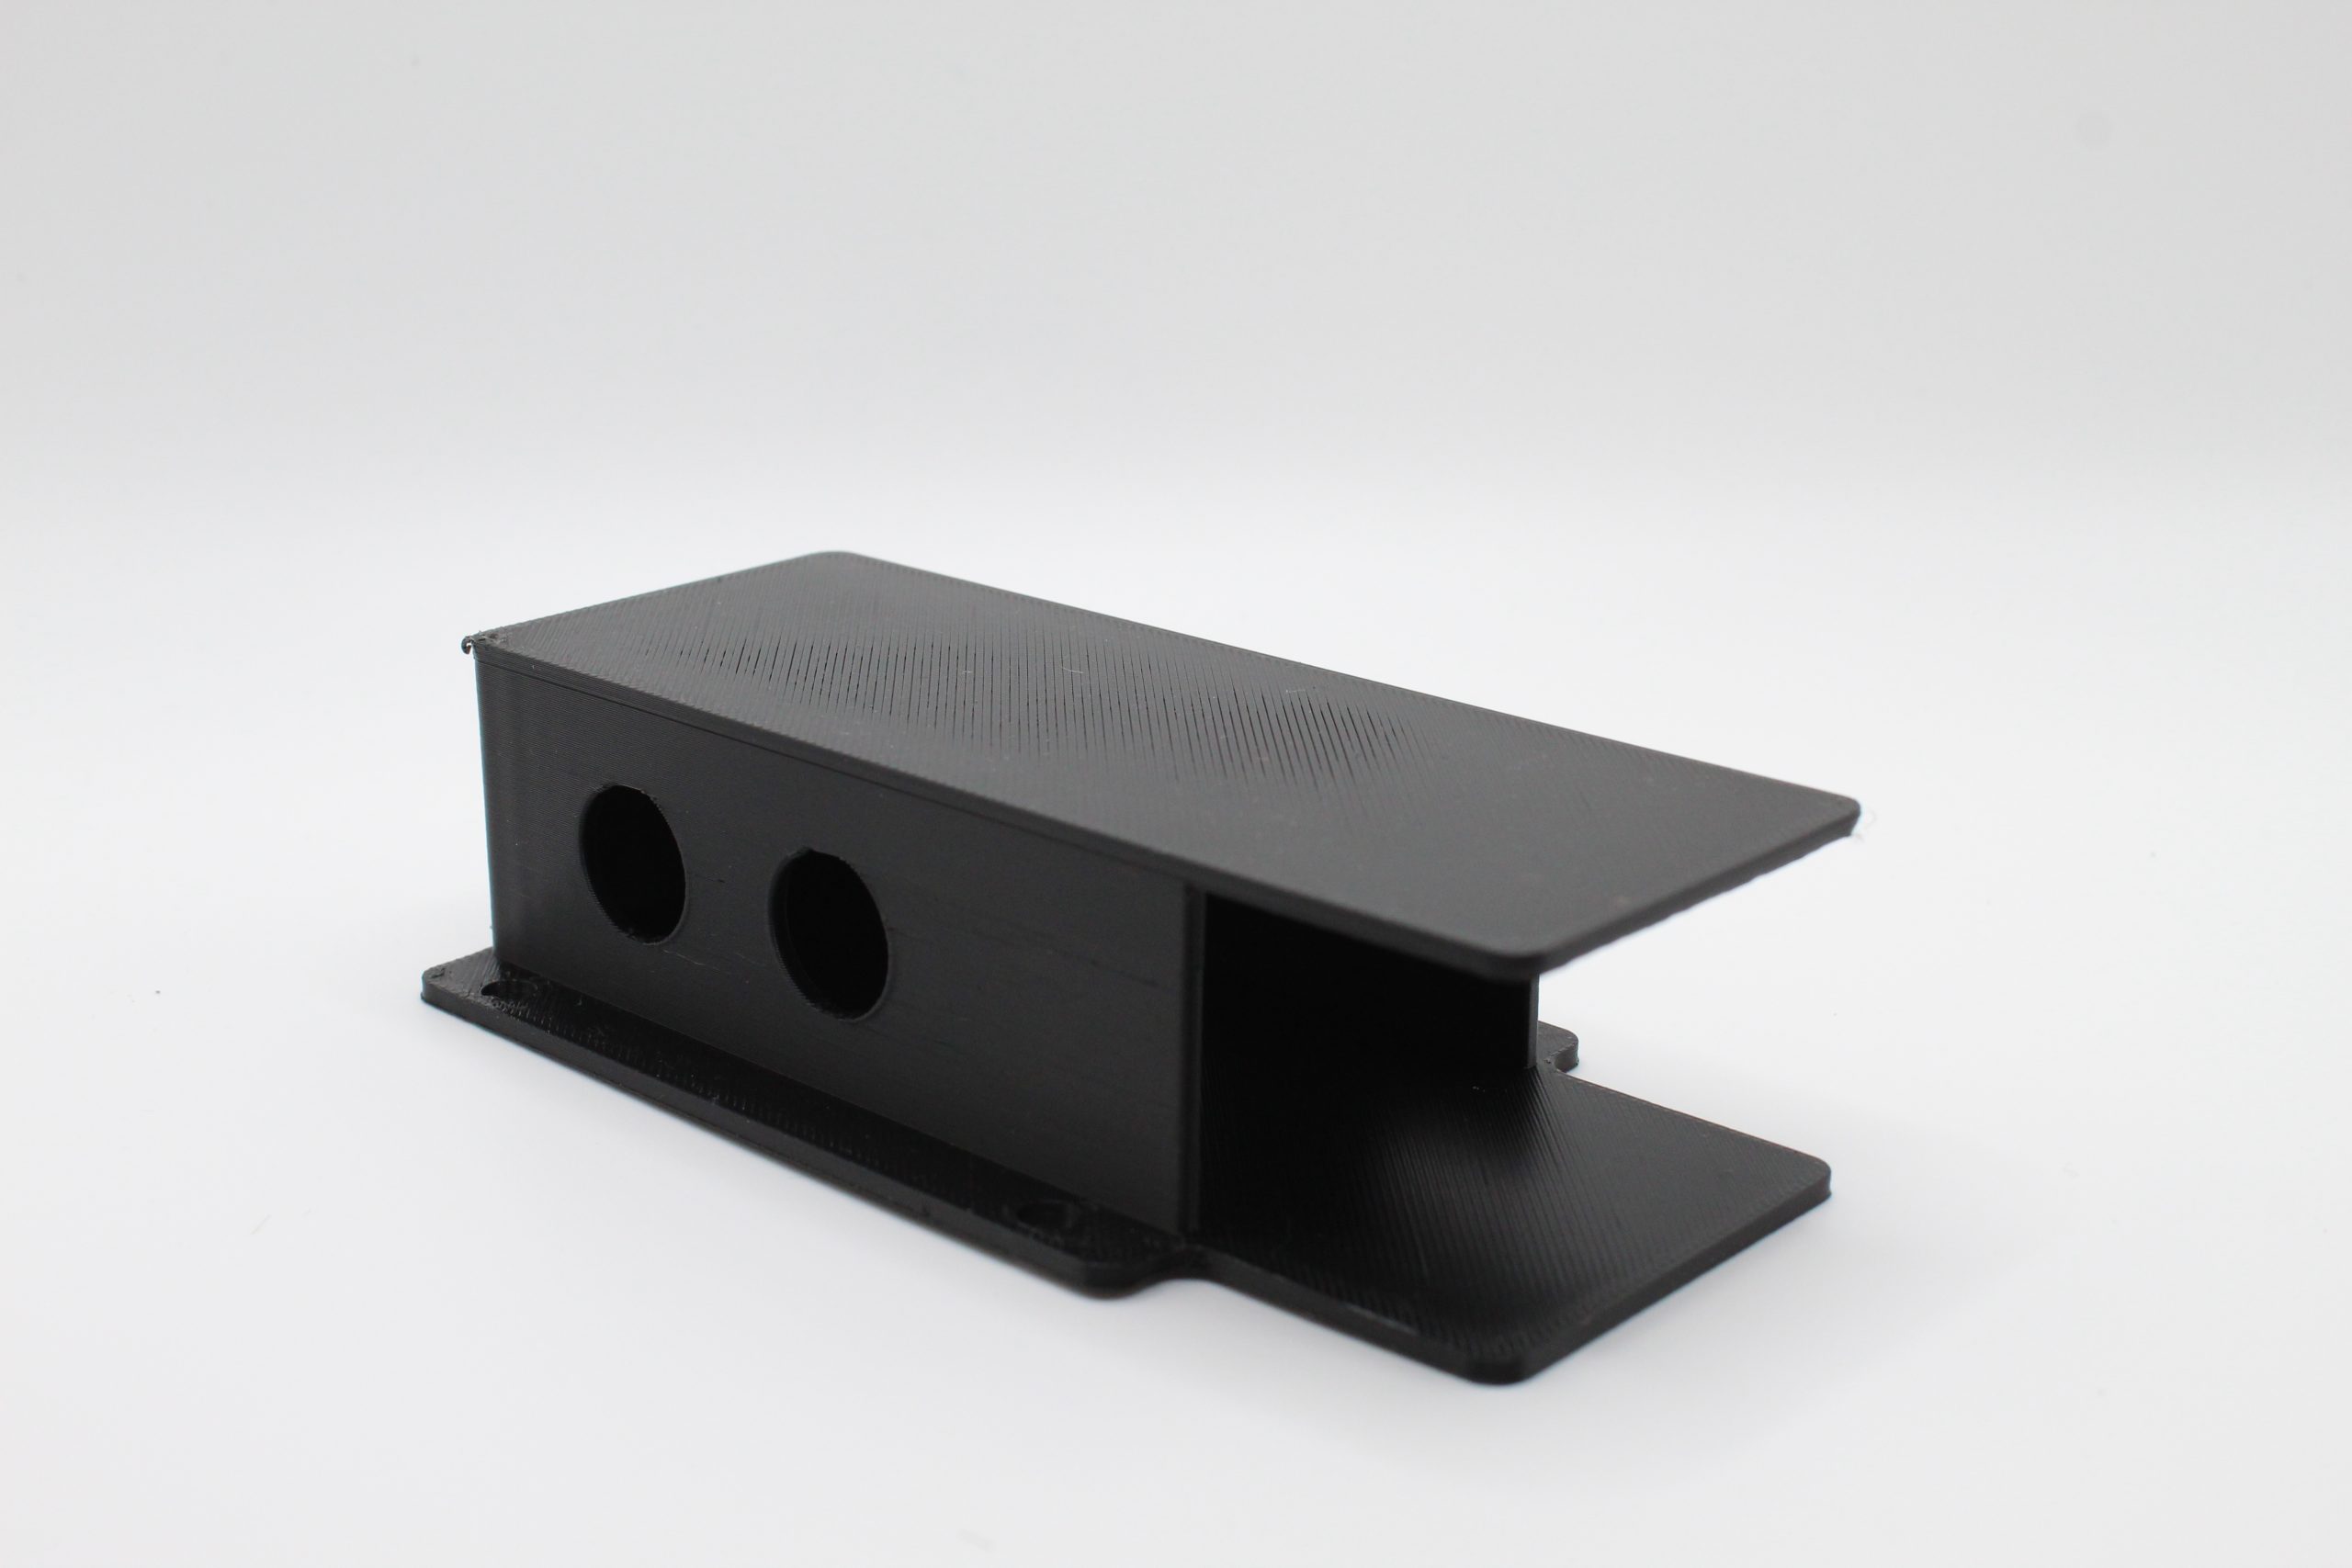
Figure 8. Part with supports removed
Overview
The bridging technique can be a very helpful technique that can save you a lot of time and material. The technique can be used when there is at least two walls spanning a gap. The allows the printer to “bridge” across the gap without the use of supports. This technique is crucial for internal cavities and is incredibly helpful to be aware of.
Bridging video from the support painting example.
How to Bridge
To do this technique, first make sure that your part will work with the technique. After this, simply either paint your supports in where you need them or don’t use supports at all. 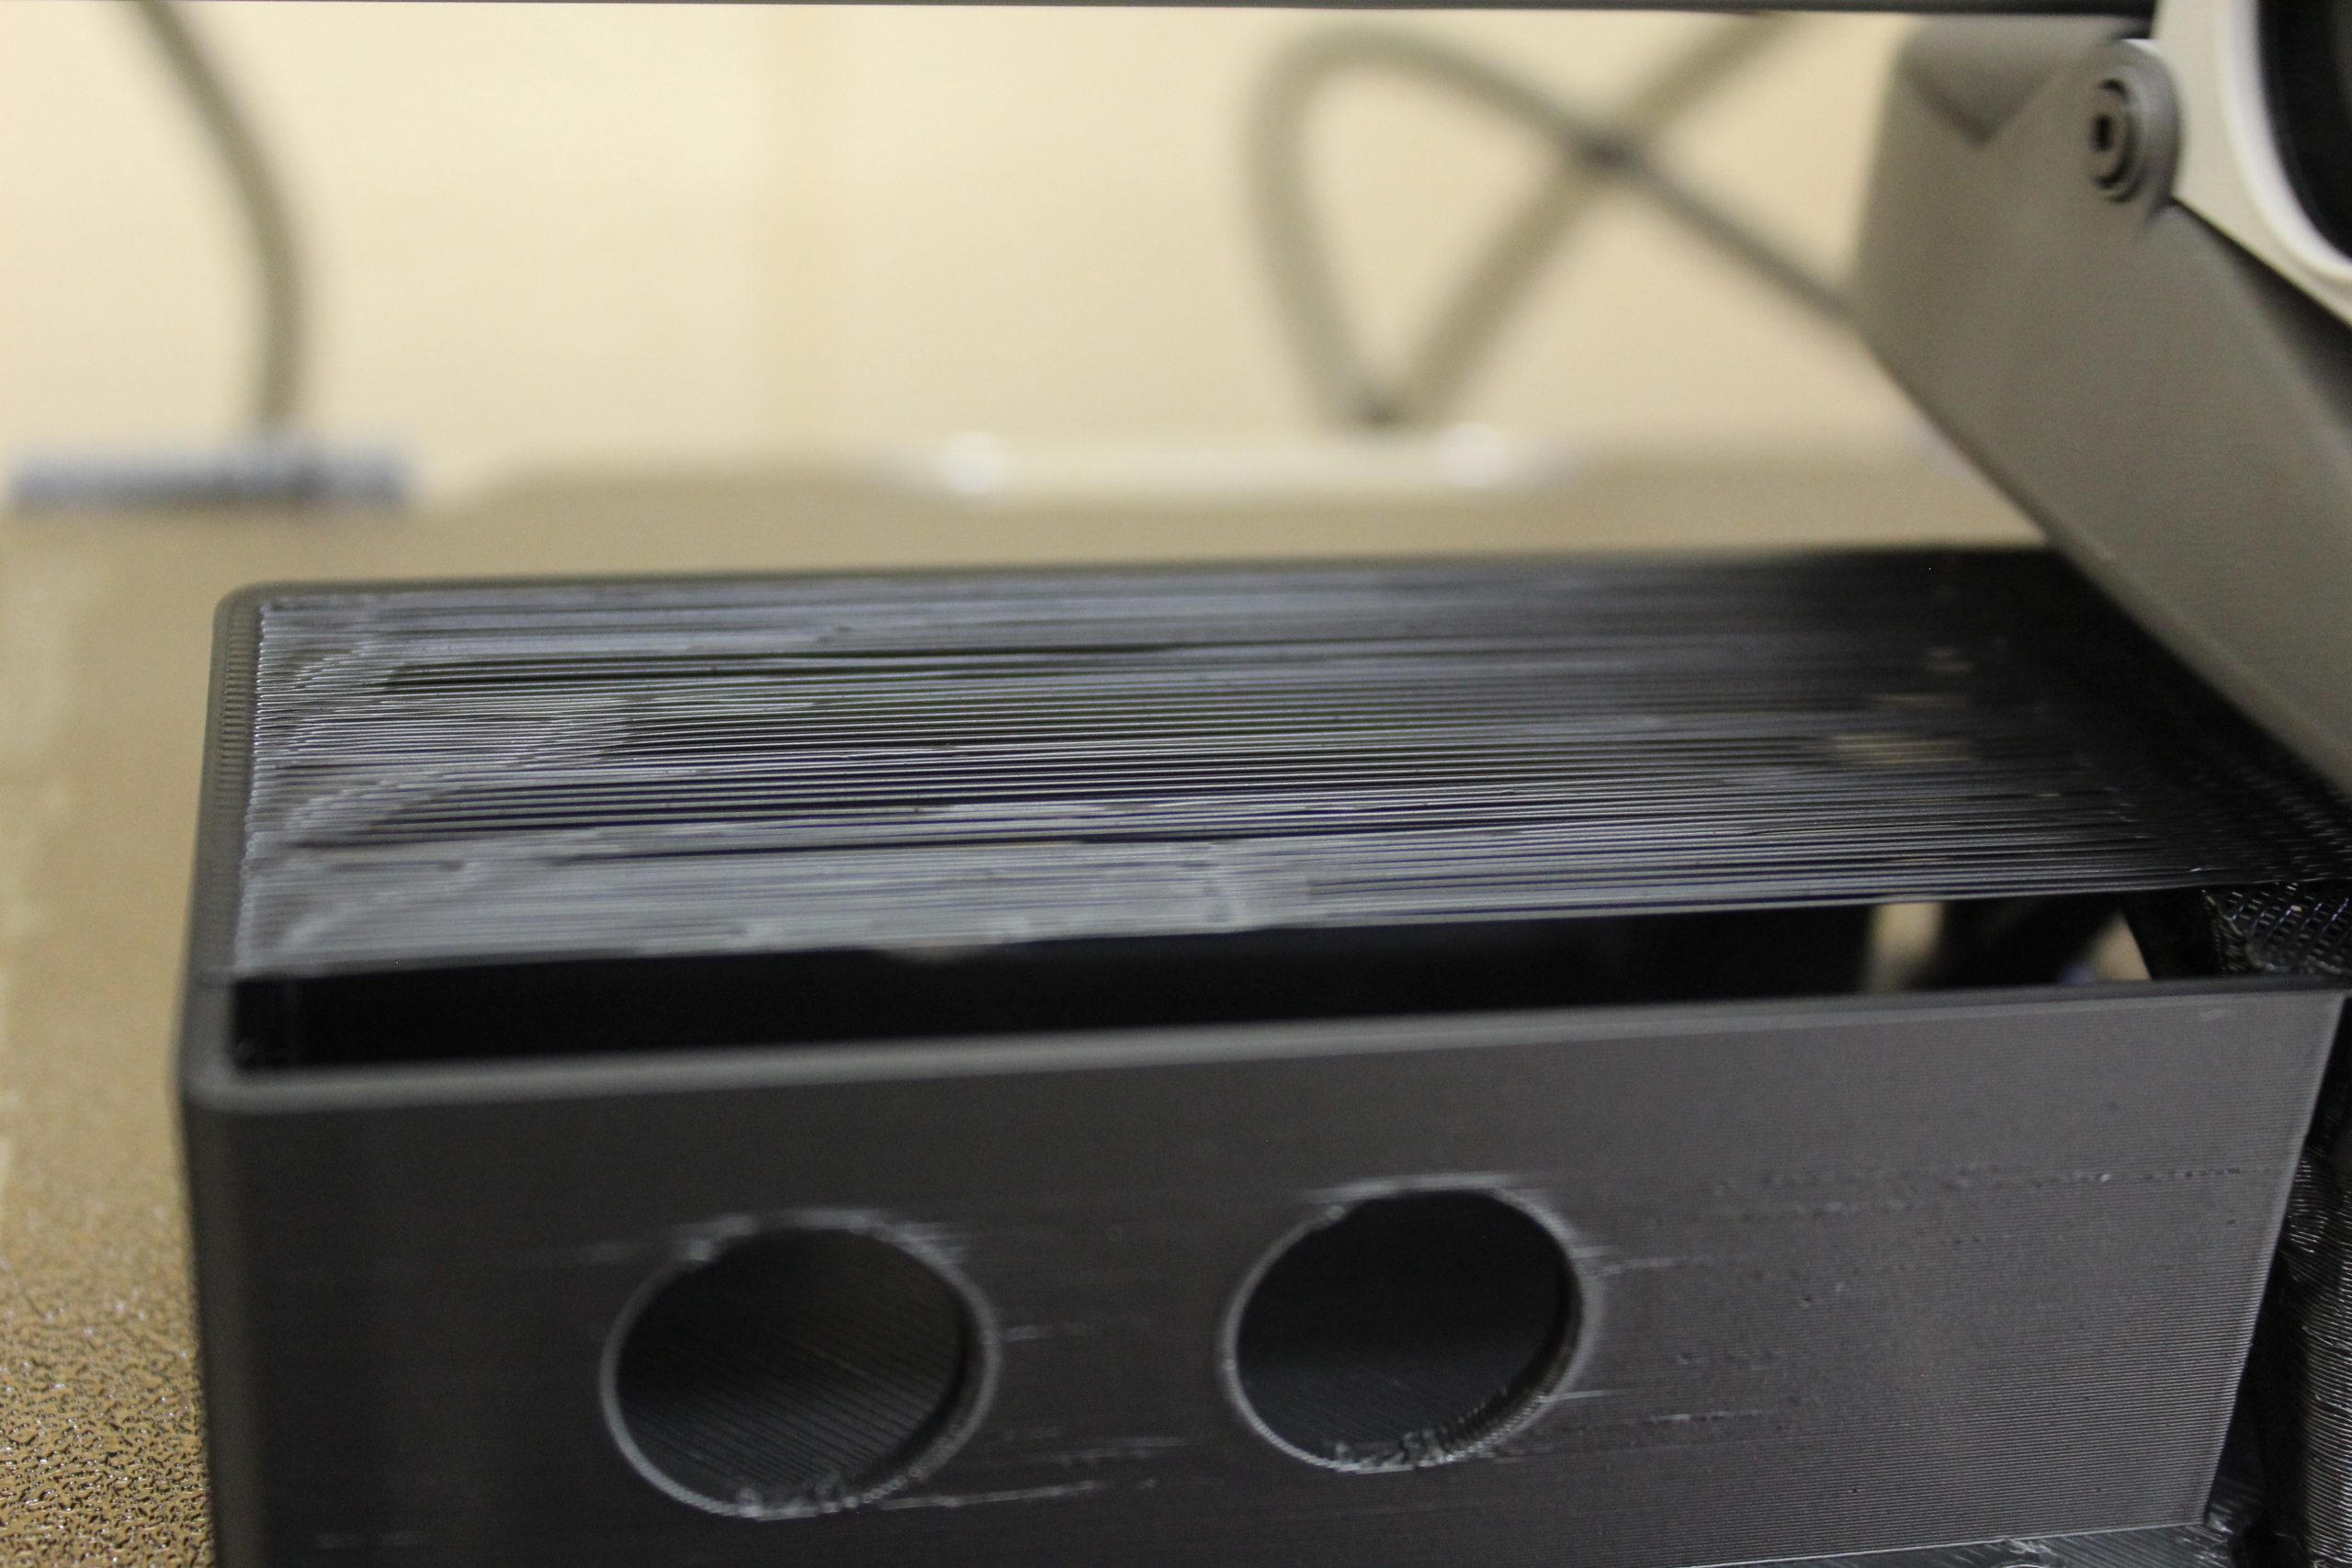
Bridging in progress